REVIEW · MOAB
Self Guided Audio Tour in Arches and Canyonlands
Book on Viator →Operated by GuideAlong (GyPSy Guide) · Bookable on Viator
In a place this big, having help in your ear makes the day feel twice as smart. This GuideAlong (GyPSy Guide) audio tour guides you through Arches National Park and Canyonlands’ Island in the Sky, with narration that plays automatically as your phone detects where you are. I like that it’s truly private (one purchase covers everyone in the vehicle), and I also like the flexible pacing—no checklists, no group herding.
The biggest thing to keep in mind is also the easiest to miss: the tour price does not include national park entrance fees, so you’ll still need to budget for those separately if you don’t already have a pass.
In This Review
- Key points before you go
- Entering Arches and Canyonlands with a phone in the driver’s seat
- Price and what you still pay for at the gate
- How the GuideAlong app works (and how to avoid the only real problem)
- The most common “gotcha”
- Arches National Park: building your own route around the icons
- Stop 1: Arches National Park drive route (admission not needed for the tour itself)
- Windows, Double Arch, and Delicate Arch: short walks, big impact
- Stop 5: Double Arch
- Stop 6: The Windows
- Stop 7: Delicate Arch
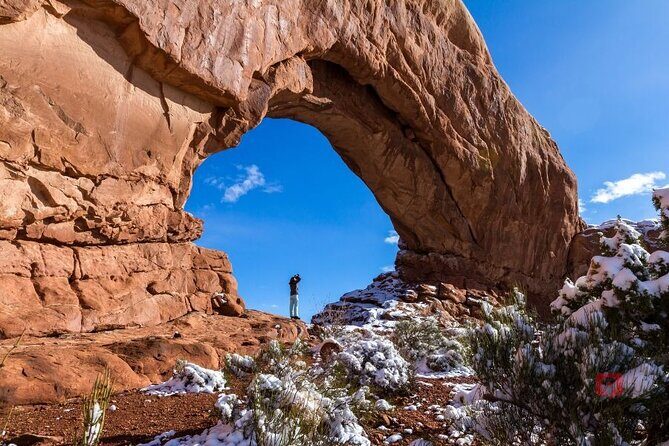
- Landscape Arch and Devils Garden: when the guide helps you understand the trail reality
- Stop 3: Landscape Arch details (and why the center is different now)
- Stop 4: Devils Garden trailhead and what to look for
- Canyonlands Island in the Sky: sunrise, sunset, and viewpoints that feel endless
- How to time Island in the Sky
- Mesa Arch, Green River Overlook, and Grand View Point: the “classic shots” strategy
- Stop 12: Mesa Arch
- Stop 11: Green River Overlook
- Stop 10: Grand View Point Overlook
- Park Avenue, Courthouse Towers, and Skyline Arch: short hikes with photo payoff
- Stop 8: Park Avenue Trail
- Stop 9: Skyline Arch
- Upheaval Dome and Aztec Butte: science questions and Pueblo ruins
- Stop 13: Upheaval Dome
- Stop 14: Aztec Butte Trail
- The Needles: a worthy side trip if you have extra time
- Timing detail
- Practical photo and timing tips that actually help
- Who this self-guided audio tour is best for
- Should you book this Arches and Canyonlands audio tour?
- FAQ
- Is the tour price per person or per group?
- Does the tour include national park entrance fees?
- Does the narration play automatically, or do I press play?
- Can I download and use it offline?
- Can I start and end anywhere along the route?
- How long does the experience take?
- What language is the tour offered in?
Key points before you go
GPS autoplay while you drive so you don’t have to stop and press play every few minutes.
Offline-ready audio once you pre-download, which matters in the parks.
Value pricing for up to 8 people per group purchase, not per person.
Flexible routing lets you match hikes and viewpoints to daylight and energy.
Clear hike details where trails matter, including notes like a closed section under Landscape Arch.
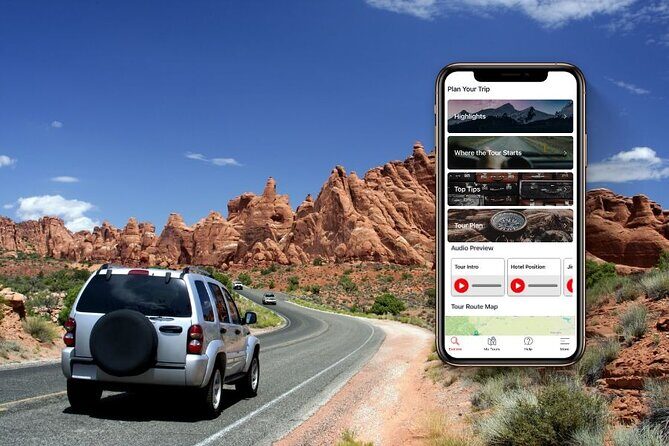
Entering Arches and Canyonlands with a phone in the driver’s seat

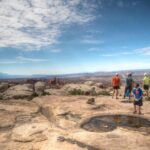
Arches and Canyonlands are two different styles of “how did nature do this?” Arches gives you tight, iconic formations you can hop between by car. Canyonlands (especially Island in the Sky) gives you bigger sweeps—canyons stacked on canyons, with viewpoints that feel like you’re peering into deep time.
This audio tour is built for the way most of us actually travel here: you drive, you park, you hop out for pictures and short walks, then you’re back in the car before your legs cool off. With location-based narration, your phone’s GPS becomes the “anchor.” When you reach a stop, the story and directions kick in.
It also helps that the tour is designed to be one-time purchase with no expiry and includes free updates. That means if you plan to come back to Utah later (a very common outcome after Arches), you’re not starting over.
Other Arches National Park tours we've reviewed in Moab


Price and what you still pay for at the gate
The tour costs $24.99 per group, for up to 8 people in your vehicle. That’s a big deal here because admission and gas are the real budget hitters—not a guided experience fee.
What the price does not cover is straightforward: entrance fees and national park passes are not included. So if you’re counting dollars, build the total day cost with two parts:
- the audio tour purchase (once per vehicle/group)
- park entry costs on top
If you already have an annual pass or plan to cover entry another way, this audio tour becomes extra good value because most of your spend goes toward seeing more places rather than paying for a guided service.
How the GuideAlong app works (and how to avoid the only real problem)
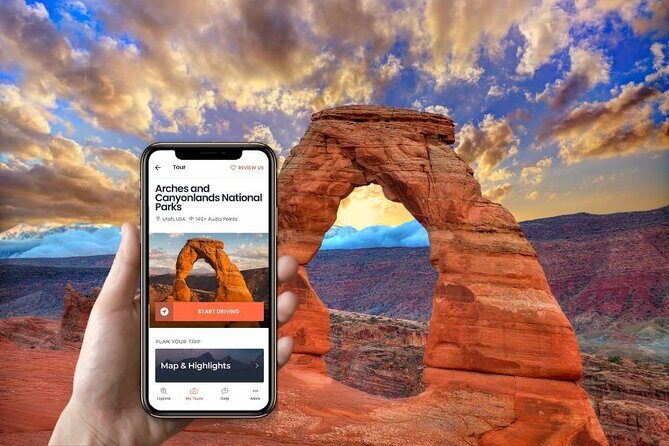
The experience lives in the GuideAlong app. After you book, you get an email/text with instructions—look for Download Audio Tour. You sign in with your Apple or Google account, redeem your voucher code, then download the app and the tour to your phone under My Tours.
Once downloaded, the tour is offline-capable, so you’re not dependent on cell service inside the parks. That’s huge in Utah, where your signal can be unpredictable.
One more practical tip: bring a charger. You’re going to run GPS, keep the screen on at least sometimes, and listen continuously. A USB car charger is cheap insurance.
The most common “gotcha”
If the app isn’t downloaded and redeemed before you start, you can end up with a day where the views are great but the narration doesn’t show up. So do the tech prep the day before (or at least in the morning before you enter the parks). It’s the difference between a guided-feeling day and a regular drive.
Arches National Park: building your own route around the icons
Arches starts with the best feature of a self-guided format: you can build your day like a choose-your-own-adventure. The audio plays based on your location, so you can create a route that fits your interests and time.
Other Canyonlands National Park tours we've reviewed in Moab


Stop 1: Arches National Park drive route (admission not needed for the tour itself)
You start with an intro to the geologic forces behind the park—how features like The Windows exist, and how weather acts slowly but constantly. You also get stories tied to people drawn to these formations, plus a reminder that the ecosystem is fragile. That matters because Arches can feel like a “park theme,” but it’s really a living, sensitive place.
The audio also nudges you toward the big, don’t-miss targets if you’re on a limited schedule:
- Double Arch
- Landscape Arch
- plus optional time savers for areas like Skyline Arch and Devils Garden
Arches has about 2,000 arches, so the guide’s real value isn’t listing everything. It’s helping you prioritize well.
Windows, Double Arch, and Delicate Arch: short walks, big impact
After the intro, Arches pivots into a classic “park highlights in a bite-sized route” approach. Several stops are quick enough that you can keep moving without burning the whole day on one trail.
Stop 5: Double Arch
Double Arch is the kind of stop that makes you pause without needing a long hike. The narration also points out why the park’s layout is so fun: certain areas pack multiple formations close together, letting you see more per hour.
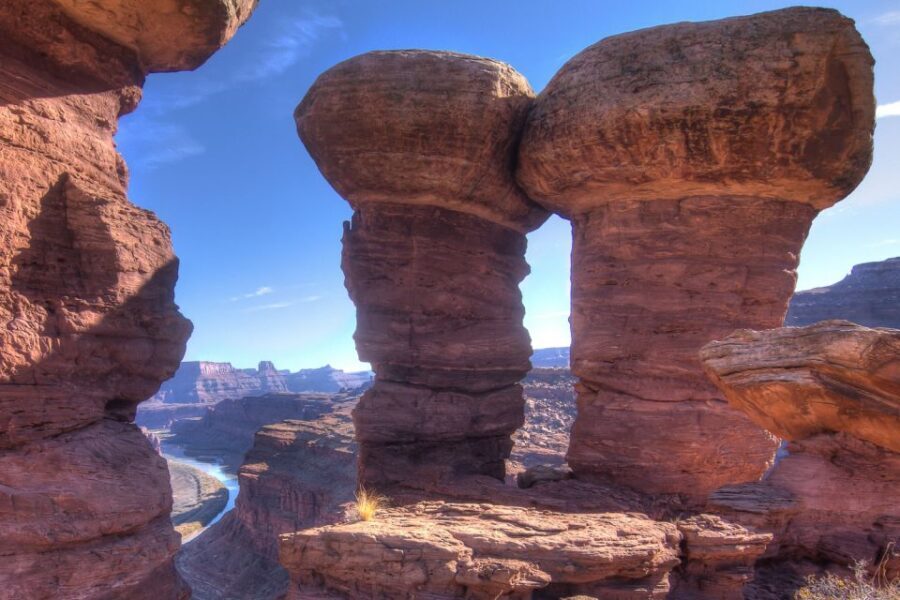
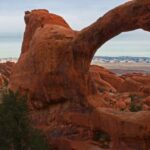
Stop 6: The Windows
This is where the audio really shines if you love framing and visual variety. Windows isn’t just one photo—your attention bounces between arches and sudden sightlines as you move through the area. The guide helps you notice what you’re looking at and what it means.
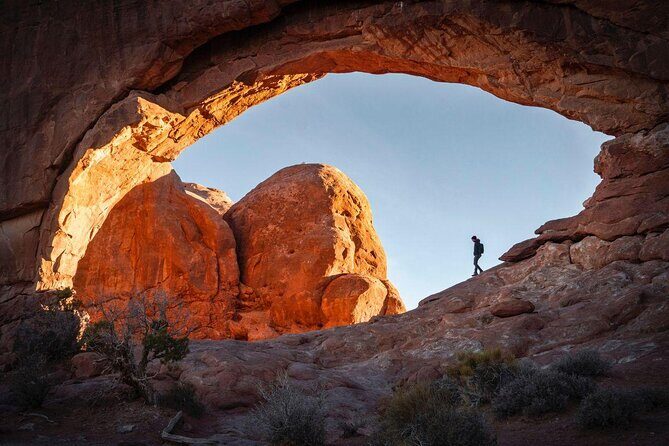
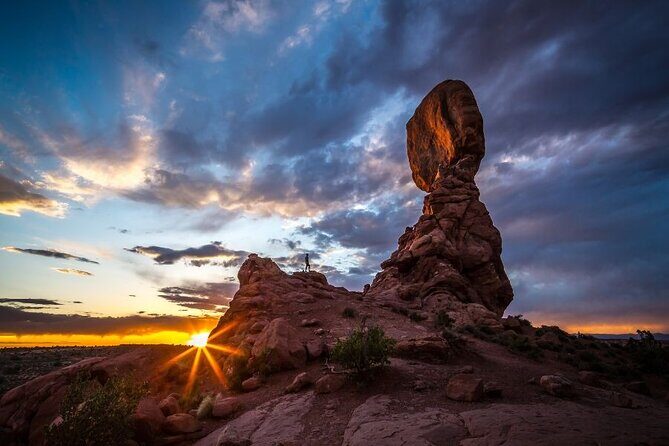
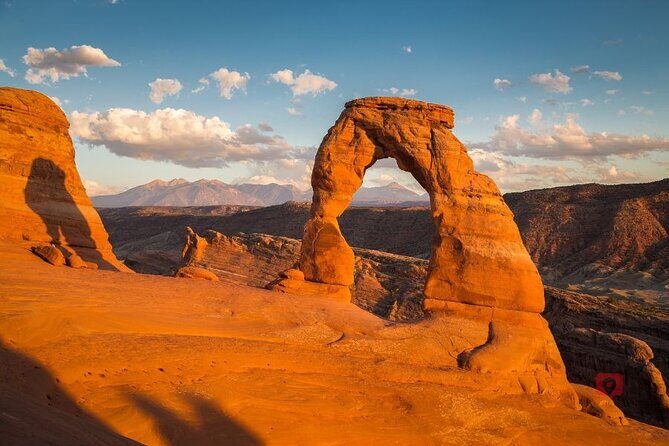
Stop 7: Delicate Arch
Delicate Arch is the celebrity. The tour includes a drive-to viewpoint option, and it also notes the uphill hike if you want to get closer. You’ll usually get the most satisfying experience if you plan your timing so the light is kind and you’re not rushed.
Practical photo note: aim for early hours when colors and shadows cooperate.
Landscape Arch and Devils Garden: when the guide helps you understand the trail reality

This is the part of Arches where knowing what’s actually accessible matters.
Stop 3: Landscape Arch details (and why the center is different now)
Landscape Arch is described as the longest span arch in Arches, stretching 300+ feet (94m), with only about 11 feet (3.5m) at its narrow center. But the key detail for your planning: the trail beneath the arch is closed due to a major fall in 1991.
The guide’s hike information is also specific: the trail begins at Devils Garden trailhead, is hard-packed with some rolling hills, and is about 1.6 miles (2.6 km) round trip. The guide also encourages early morning for best colors—helpful because you may want time for photos before the day gets harsher.
Stop 4: Devils Garden trailhead and what to look for
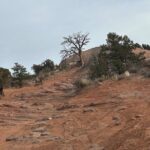
Devils Garden is a great example of why self-guided can beat a checklist. Each Arches area has its own style, and Devils Garden is known for rock “fins” (narrow rock walls before they erode into arches). Plus, it’s tied into the Landscape Arch experience, even if access under the arch isn’t what it used to be.
For a lot of people, this becomes the “main hike of Arches,” so plan water, good shoes, and extra time for looking around rather than just walking through.
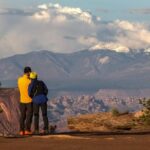
Canyonlands Island in the Sky: sunrise, sunset, and viewpoints that feel endless
Canyonlands is across the valley, but it feels like another world. The camera in your phone will be working overtime here, but the audio tour helps you understand what you’re seeing beyond the picture.
You start from Moab and head to Island in the Sky, continuing along Grand View Point Road. The route is designed around the district’s big photo moments—especially if you can work sunrise and sunset into your schedule.
How to time Island in the Sky
The tour basically gives you two modes:
- Early start for Mesa Arch sunrise
- Later start for sunset photography
If you only do one timing strategy, I’d pick sunrise for Mesa Arch—because it’s that classic shot for a reason.
Mesa Arch, Green River Overlook, and Grand View Point: the “classic shots” strategy
Stop 12: Mesa Arch
Mesa Arch is described as the classic Canyonlands image. The audio notes what you’ll see: you peer through the arch window and look out at canyon views, with clear days sometimes showing the Le Sal Mountains on the horizon.
Also, the guide prepares you for a real-world factor: expect many photographers around sunrise. It’s crowded because the timing is the product.
Stop 11: Green River Overlook
Green River Overlook is built for panoramic sunset views. You also get interpretive context—named for the rock carving actions of the Green River, and tied to the imagination of John Wesley Powell testing wooden boats before going into unknown canyon country.
You don’t need to be a history buff. That kind of story just helps you slow down and look.
Stop 10: Grand View Point Overlook
Grand View Point is “grand” in the literal sense: you look down across the valley into canyon systems, like you’re staring at a billion years of Earth history. The audio gives you a framework for seeing depth and layers, not just distance.
Park Avenue, Courthouse Towers, and Skyline Arch: short hikes with photo payoff
Canyonlands hiking here is not about miles and suffering. It’s about quick access to dramatic views.
Stop 8: Park Avenue Trail
You get an easy, paved walk to a Park Avenue viewpoint. Then the tour notes that you can continue on another 1.6 km (1 mile) down into the canyon toward Courthouse Towers, giving you a deeper “downtown skyline” feel—except your streets are cliffs.
The value: you can scale the effort to your day. Do the short version if you’re tired; keep going if you’re in the mood.
Stop 9: Skyline Arch
Skyline Arch is a short, easy walk—about 1/2 mile. The guide encourages late afternoon because it’s when the arch photographs best in low sun.
This is one of those spots where planning timing with your drive really matters. If you’re flexible, you get better light with no extra effort.
Upheaval Dome and Aztec Butte: science questions and Pueblo ruins
These two stops make your day feel more rounded—less just “rocks,” more “how people and the planet intersect.”
Stop 13: Upheaval Dome
Upheaval Dome comes with mystery. The audio explains that no one has fully explained it with factual evidence—whether it relates to meteor impacts or underground thrusting and collapse. It’s also nicknamed Utah’s belly button, and the point is simple: once you see it, you understand why people stick that label on it.
Stop 14: Aztec Butte Trail
Aztec Butte is a hike with cultural payoff. It’s a 1.2 mile round trip to ancestral Puebloan structures called granaries. The trail is described as well marked, but there’s a steep section at the end where you need to scale a slickrock slope.
That last-bit scramble matters for expectations. If you don’t like scrambling, you might decide you’d rather keep it to the easier parts and skip the steep end.
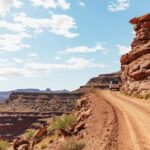
The Needles: a worthy side trip if you have extra time
If your trip includes one spare day, or if you’re routing through the region anyway, The Needles district can be a strong add-on.
The guide explains that Needles is about a 90-minute drive south of Moab. It’s known for colorful spires of Cedar Mesa Sandstone, and it gets far less visitors than Island in the Sky. You also get an advantage that feels practical: the approach on Highway 211 is scenic, with petroglyphs at Newspaper Rock as part of the drive.
Timing detail
The Needles turnoff from Highway 191 is about 40 minutes away, and the Needles stop is listed as about 1 hour in the tour rhythm. So you’re not committing to a huge hiking day here, but you are adding variety.
Practical photo and timing tips that actually help
Here’s how I’d plan your day if you want the best chance of good light and low stress.
- Use sunrise for Mesa Arch if you’re willing to get up early. The guide’s biggest scheduling emphasis is there.
- Try Landscape Arch early for color, because morning light makes sandstone pop and shadows work better for arches and narrow spans.
- Save Skyline Arch for late afternoon when the sun is low. It’s a short walk, so timing is the main variable.
- Accept closures and plan for access. Landscape Arch’s center trail-under closure changes the experience, but the guide gives you an appropriate loop plan.
- Bring a charger and don’t let your phone battery decide your itinerary.
Who this self-guided audio tour is best for
This tour fits best if you like control. You can start, stop, and resume anytime along the route, because commentary triggers by GPS where you are.
It’s especially good for:
- couples and families who want one shared experience without paying per person
- photographers who want to chase sunrise and sunset but hate rigid tour schedules
- travelers who are comfortable navigating by car and enjoy reading the land through short walks
If you hate using your phone for anything beyond maps, this might feel like extra work. But if you’re already doing road-trip navigation, the app becomes the guide.
Should you book this Arches and Canyonlands audio tour?
If your goal is to see the big highlights in Arches and Canyonlands without spending time in a group and without guessing what to prioritize, I think it’s a smart buy. GPS autoplay, offline-ready audio, and the up-to-8 group pricing make it a good fit for value-minded trips.
I’d hold off only if you’re planning to rely on cell service inside the parks or you’re the type who never pre-download apps. The day is too good to let battery and connectivity turn your “guided” drive into a plain one. If you do the simple tech prep, this becomes a calm, flexible way to experience two of Utah’s most iconic park days.
FAQ
Is the tour price per person or per group?
It’s $24.99 per group, and the group size is up to 8 people in your vehicle.
Does the tour include national park entrance fees?
No. Entrance fees and national park passes are not included.
Does the narration play automatically, or do I press play?
The commentary plays automatically based on your GPS location while you drive along the route.
Can I download and use it offline?
Yes. You can pre-download the tour, and once downloaded, it works offline with no internet or cell service needed.
Can I start and end anywhere along the route?
Yes. The tour notes that commentary plays based on location, so you can flex where you start and end anywhere along the tour route.
How long does the experience take?
It’s listed as 8 hours to 1 day (approx.), depending on how many stops you do and how long you spend at each.
What language is the tour offered in?
The tour is offered in English.