REVIEW · MOAB
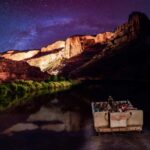
Sunrise photography in Dead Horse Point and Canyonlands National Park
Book on Viator →Operated by Rock Light Photo Tours · Bookable on Viator
Few things beat canyon light at 5:00am. This sunrise photography outing around Dead Horse Point State Park and Canyonlands National Park is built for people who want better pictures, not just a scenic drive. I especially liked the hands-on way Colin guided composition and camera settings, plus the small group size that actually lets you ask questions instead of shouting over a van.
My other favorite part is how the tour is paced: you get dedicated time at Dead Horse Point, then you move into Canyonlands with a clear plan for where to shoot and what to look for. One consideration: it does require some walking on short hikes (under 1 mile) and it runs only when conditions are good, since weather can affect the route and timing.
In This Review
- Key points to know before you go
- Why Dead Horse Point at sunrise feels like a cheat code
- Small-group coaching with Colin: help you can use immediately
- Dead Horse Point State Park: 90 minutes of sunrise focus
- Canyonlands National Park: two hours, 1–2 shooting targets
- Corona Arch near Moab: a bonus arch stop if timing allows
- Price and value: $250 makes sense if you want real coaching
- Timing, pickup, and what your morning actually looks like
- The fitness and weather realities (so you’re not surprised)
- Optional Arches add-on: turn sunrise practice into a full Moab photography day
- Who should book this sunrise photo tour
- Should you book Rock Light Photo Tours?
- FAQ
- What time does the sunrise tour start?
- Where do I meet for the tour?
- How long is the tour?
- How many people are in the group?
- Are pickup and mobile tickets included?
- What is included in the tour price?
- Do I need a park pass for Canyonlands National Park?
- Is walking involved?
- Can I add Arches National Park?
Key points to know before you go
- Max 6 people means more attention when you get stuck on focus, exposure, or framing
- Dead Horse Point first gives you prime sunrise angles before the light hardens
- Canyonlands time is tight (about two hours), so you’ll shoot at 1–2 locations instead of cramming everything
- Water and snack bars are included, so you can stay focused on the camera
- Short hikes are involved at some stops, but they stay under one mile
- Optional Arches add-on can turn this into a full-day Moab photography push
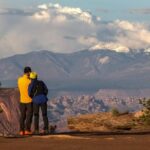
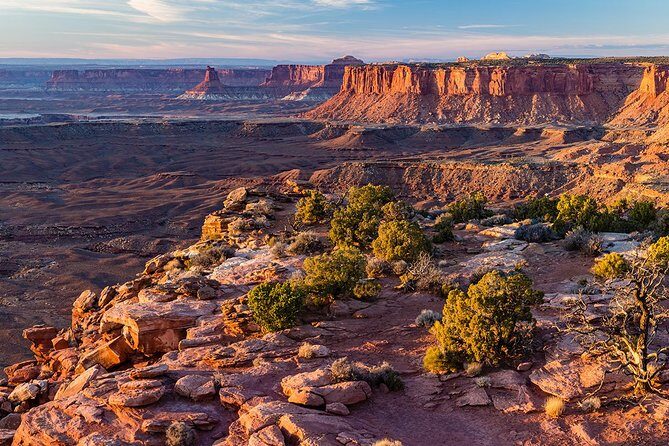
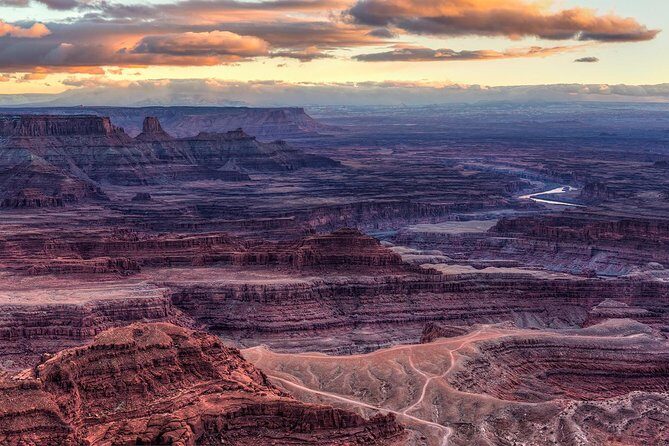
Why Dead Horse Point at sunrise feels like a cheat code
If you’ve ever tried to photograph canyons at sunrise on your own, you know the problem: you spend time figuring out where to stand and what to shoot instead of actually shooting. This tour tackles that head-on. You meet early, then you’re guided to viewpoints that work with the angle of the morning light—so you spend your effort on photos, not map apps.
Dead Horse Point is a short-drive, high-impact place for photography. From the overlooks, you can capture dramatic layers and sweeping views without turning the day into a major hike. I like that this experience balances “big views” with “learnable photography.” You’re not just chasing pretty colors—you’re working on choices like where to put the horizon, how to layer depth, and how to control settings for early light.
The early start is part of the magic, but it’s also the trade. You’re up at 5:00am, and you’ll be moving while most people are still negotiating with sleep. If mornings are your enemy, plan a strategy now—set the alarm, prep your camera the night before, and trust that the light will be worth it.
Other Canyonlands National Park tours we've reviewed in Moab


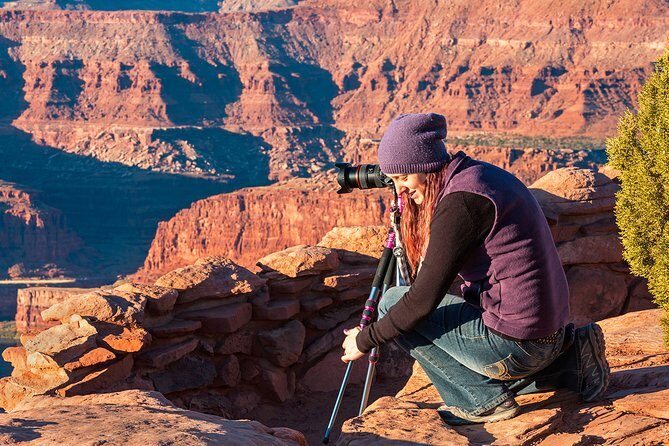
Small-group coaching with Colin: help you can use immediately
The best thing about this tour is that the “photography lesson” isn’t vague. Colin (the guide named in the reviews) is patient, and that matters. When you’re trying to adjust focus, exposure, or composition, you don’t need pressure. You need someone who will slow down and show you what to change.
You’ll get two types of coaching:
- Composition guidance: where to stand, how to angle your camera, and how to frame the scene so it looks intentional.
- Camera setting help: practical direction so your settings match what the light is doing.
That pair is why this works for beginners. If you’re new, it can feel like you’re either getting lucky or doing everything wrong. A guide can point out what to prioritize—like avoiding a washed-out frame when the sky is bright, or choosing an angle that gives you depth instead of a flat image. Even if you already shoot, you’ll likely pick up tweaks that make your images more consistent.
And because the group cap is six travelers, you won’t disappear into the crowd. You can actually get help when you ask a question. In a busy Moab tour, that’s rare—and it changes the whole experience.
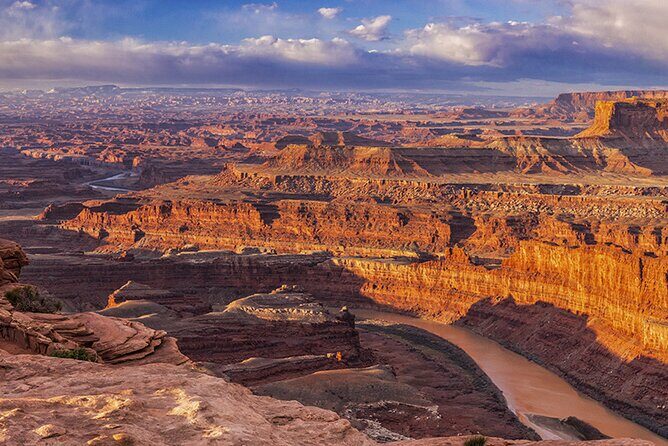
Dead Horse Point State Park: 90 minutes of sunrise focus
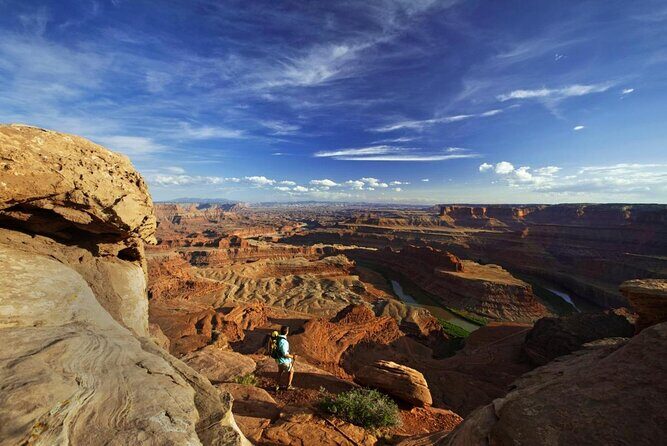
Dead Horse Point State Park is the first stop, and that order is smart. The morning light is at its most cooperative early, and the tour gives you about 1 hour 30 minutes there to work the viewpoints.
What I like about this stop is that it’s set up for experimenting. You’ll photograph from several viewpoints around Dead Horse Point. That means you can test different framing options—higher vs. lower angles, foreground inclusion vs. clean horizons, and compositions that use the canyon’s shapes to lead your eye. Instead of one photo and done, you get time to build a small set of images.
Also, admission is included for Dead Horse Point State Park. That removes one common “gotcha” when planning a park-based tour—less paperwork, fewer decisions at the last minute.
What to watch for, practically: early light can change fast. Even with a guide, you’ll want to be ready to move when it’s time to switch spots. If you’re the type who takes one photo and starts scrolling, this tour will gently push you to slow down on shooting and speed up on preparation.
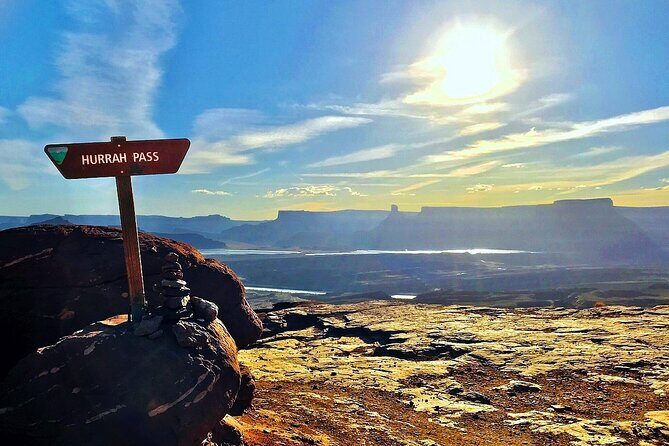
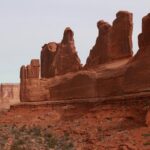
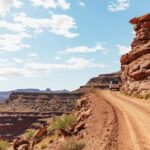
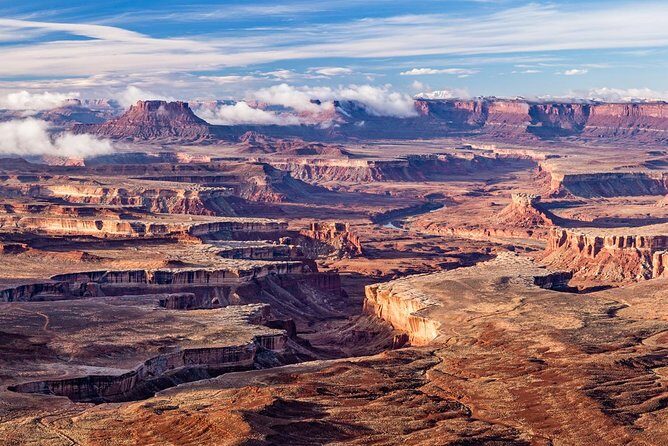
Canyonlands National Park: two hours, 1–2 shooting targets
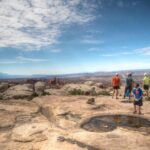
Then you move into Canyonlands National Park for about two hours. Here’s the key: you won’t try to cover the whole park. You’ll photograph at 1–2 locations, depending on weather and time.
That “small target” approach is what makes this more valuable than a big sightseeing tour. Canyonlands is wide, and it’s easy to waste daylight traveling between overlooks. With a guide, you get a plan that respects sunrise timing: shoot where the view works, make the most of the light, then get out before the best angles pass.
One important detail you need to plan for: admission to Canyonlands National Park is not included. You’ll want to bring your park pass. If you forget, you’ll lose time at the gate, and sunrise waits for nobody.
I also like that the tour keeps the route flexible. Weather can affect visibility and contrast, especially in canyon country. If the conditions don’t cooperate, your guide can shift where you shoot rather than forcing you into a spot that’s not working that morning.
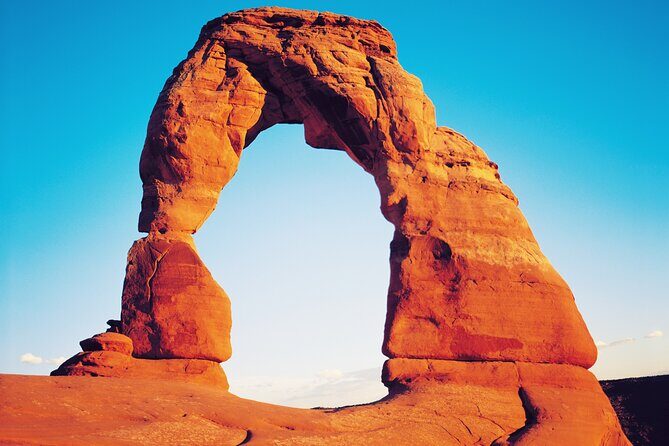
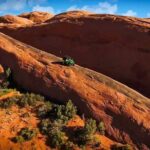
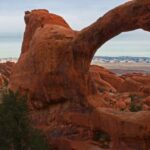
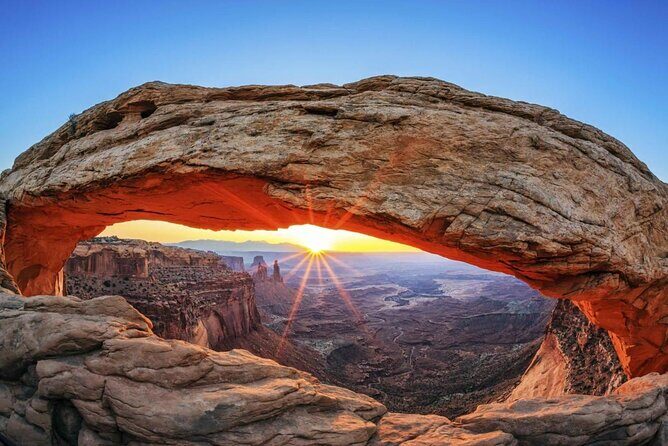
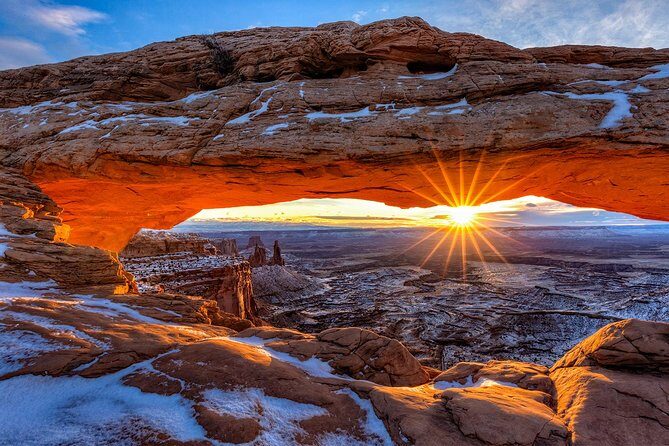
Corona Arch near Moab: a bonus arch stop if timing allows
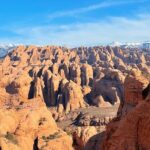
There’s also a stop tied to Corona Arch, a natural sandstone arch near Moab. It sits in the same rock formation as Pinto Arch and Bowtie Arch, which is helpful context if you’re the kind of photographer who likes to understand how the terrain shapes the scene.
What you can take from this: if you want something different from pure canyon overlooks, arch photography adds a new visual theme. Arches also give you an easy way to frame the sky and use natural shapes as borders, which can be a fun reset after wide views.
One caution: the exact time at this kind of bonus stop isn’t spelled out in the same way as Dead Horse Point and Canyonlands. So treat it as part of the overall early-morning workflow, not a guaranteed long hike. If you want it, make sure your camera is ready and your legs are warmed up.
Other Dead Horse Point tours we've reviewed in Moab

Price and value: $250 makes sense if you want real coaching
At $250 per person for a 4 to 6 hour experience, you might wonder if this is “just a sunrise drive with snacks.” It’s not. The value comes from three things you don’t get in a typical self-guided sunrise outing:
1) An instructor who watches your framing and settings
2) A small group size that keeps the pace workable
3) Time-saving planning so you reach the best photo spots in the right order
You also get cold water and snack bars included, which is a practical win. Sunrise photo days can turn into “hangry mode” fast, and when that happens, your creativity suffers. Having fuel on board helps you stay focused.
The two main cost-related realities:
- You’ll still need a park pass for Canyonlands since admission isn’t included.
- You should assume some walking on short hikes (under 1 mile) depending on the locations chosen.
If you’re traveling solo with no local photography knowledge, this tour often pays for itself by preventing wasted time. If you already know exactly which viewpoints you want and you’re happy with pure self-guided shooting, you might find a cheaper route. But if you want help getting better images, this price feels fair.
Timing, pickup, and what your morning actually looks like
The tour starts at 5:00am and meets at the Moab Information Center, 25 E Center St, Moab, UT 84532. Pickup is offered (when available), and the tour ends back at the meeting point.
That morning schedule matters because sunrise photography is a timing game. The earlier you arrive at the right viewpoint, the more options you have. That’s why the tour begins before most businesses even open and why your guide’s plan is the main driver of the experience.
The total duration is listed as 4 to 6 hours, which fits the reality of sunrise photography: you’re not only shooting, you’re waiting for the light to change and moving between spots. Expect the day to feel efficient. You won’t have time to wander off on your own.
If you’re a beginner, this structure is comforting. You get step-by-step targets: arrive, shoot from a series of viewpoints at Dead Horse Point, then switch into Canyonlands for one or two focused locations. If you’re more advanced, you’ll still benefit from the guided angles and “what to adjust now” coaching.
The fitness and weather realities (so you’re not surprised)
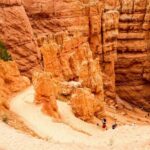
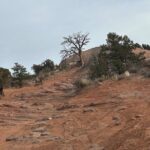
This experience asks for moderate physical fitness. Some locations require short hikes of less than 1 mile. That’s usually manageable, but it’s still uneven terrain in canyon country. If you have mobility limits, you’ll want to consider whether you can handle short, early-morning walks on rocky ground.
Weather is another big factor. The tour requires good weather, and if it’s canceled due to poor conditions, you’ll be offered a different date or a full refund. I like this approach because it respects the fact that sunrise photography depends on more than just showing up.
So bring your patience for planning. This is the kind of tour where the light is the main character. If the sky doesn’t cooperate, the tour adapts or it pauses.
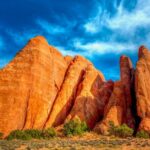
Optional Arches add-on: turn sunrise practice into a full Moab photography day
If you want more time and more subjects, there’s an option to extend to Arches National Park. The upgrade turns the outing into a fuller-day experience on request, which can be great if you’re aiming to cover multiple iconic Moab photography styles.
Arches tends to shift the look from wide canyon depth to something more centered—arches, framing opportunities, and different compositions. Pairing that with sunrise coaching can help you carry what you learned at Dead Horse Point into arches later.
One practical note: adding Arches likely means you’ll be working longer hours, so think about your energy. But for camera people, it’s a logical way to stretch the value of a guided morning session.
Who should book this sunrise photo tour
This tour is a strong fit if:
- You want better composition and guidance on camera settings, especially as a beginner
- You like small groups and don’t want to compete for attention
- You want a guided route that gets you to the best sunrise photo areas in the right order
It might not be your best match if:
- You hate early mornings and won’t be functional at 5:00am
- You prefer long, solo wandering time over focused shooting targets
- You’re not comfortable with short walks at canyon viewpoints
If you’re somewhere in the middle, that’s fine. Even if you consider yourself “just a vacation shooter,” the coaching approach can help you leave with images you actually like—not just a camera full of maybes.
Should you book Rock Light Photo Tours?
I’d book this if your goal is to come home with stronger photos and you’re willing to trade sleep for sunrise light. The small group size and the hands-on guidance—especially the kind of patience described by Colin—make the difference between guessing and improving.
Before you commit, make sure you’re ready for:
- a very early start
- short walks on uneven ground
- bringing your Canyonlands park pass
- a schedule that focuses on 1–2 key shooting locations when it counts
If that sounds like your kind of trip, this is a smart, efficient way to learn while you shoot in some of the most photogenic terrain near Moab.
FAQ
What time does the sunrise tour start?
It starts at 5:00am.
Where do I meet for the tour?
Meet at the Moab Information Center at 25 E Center St, Moab, UT 84532.
How long is the tour?
The duration is approximately 4 to 6 hours.
How many people are in the group?
The tour caps groups at a maximum of 6 travelers.
Are pickup and mobile tickets included?
Pickup is offered, and mobile ticketing is used.
What is included in the tour price?
Cold water and snack bars are included.
Do I need a park pass for Canyonlands National Park?
Yes. Admission to Canyonlands National Park is not included, so you should bring your park pass.
Is walking involved?
Yes. Some locations require short hikes of less than 1 mile, and you should have moderate physical fitness.
Can I add Arches National Park?
Yes. You can request an option to extend the tour to include Arches National Park for a full-day experience.