REVIEW · MOAB
Arches National Park Morning & Afternoon Van Tours
Book on Viator →Operated by Adrift Adventures · Bookable on Viator
Four-and-a-half hours, and you get the best of Arches. This Moab van tour lines up the Windows section and Delicate Arch Overlook with a friendly expert guide, plus ice-cold water and snacks so you can stay out enjoying the views. The one thing to think about is the road itself: it’s not recommended if you get motion sickness or have vertigo.
I like that the tour is built for easy Arches days. Admission is handled for you, and timed entry passes aren’t needed on this trip, so you’re not juggling extra steps before you start. Parking is also available at the office where you meet.
At $210 per person, this isn’t a budget outing, but you are paying for a guided route, an air-conditioned vehicle, and entrance covered in the price. If you’re the type who hates wasting time, the small group setup (max 12) helps.
In This Review
- Key points to know before you go
- Arches National Park by Van: Fast Access, Fewer Decisions
- Price and Value at $210: What You’re Really Paying For
- Comfortable Vehicle Details That Matter in Moab Heat
- Stop-by-Stop: The Route That Walks You Through Arches
- Windows Section: Where Framed Rock Views Start the Story
- Balanced Rock: The Quick Reality Check on Erosion
- Delicate Arch Overlook: The Big Icon, Without the Long Standby
- Sanddune Arch: Small Detail, Strong Visual Payoff
- Panorama Point: Big Views Need Your Camera Ready
- La Sal Overlook: A Break from Rocks Toward the Bigger Picture
- Park Avenue: The Alleyway Feel of Arches
- Guide Style: Why Bill and Phil Make the Day Feel Worth It
- What to Bring for a Comfortable Arches Half-Day
- Who This Van Tour Is Best For (And Who Should Skip It)
- Should You Book This Arches National Park Morning & Afternoon Van Tour?
- FAQ
- How long is the Arches National Park morning and afternoon van tour?
- What does the tour cost?
- Where do I meet for the tour in Moab?
- Is there a limit on group size?
- What language is the tour offered in?
- Is timed entry required for this tour?
- What’s included in the price?
- What isn’t included?
- Is there a mobile ticket?
- What should I bring?
- Do I need to do anything the day before?
Key points to know before you go

- Max 12 travelers in the van: less crowding, more chances to ask questions
- No timed entry pass needed: admission is included so you can focus on stops
- Big observation windows: easier viewing and photos without crowding at viewpoints
- Ice, water, and snacks included: you’ll stay comfortable for a 4.5-hour outing
- Famous Arches lineup in one route: Windows, Balanced Rock, Delicate Arch area, and Park Avenue
- Good-weather dependent: if conditions are poor, you’ll switch dates or get a full refund
Arches National Park by Van: Fast Access, Fewer Decisions

If you only have half a day and you want the hits, this tour format makes sense. You’re not trying to map out a self-drive loop, find parking, then guess where you can realistically fit everything before the sun gets low. Instead, the day is paced around a set route through the Arches areas most people come for.
The timing is also practical. A morning or afternoon slot gives you options depending on your energy level and your heat tolerance. Arches can get intense, so having a vehicle breaks up the day nicely between viewpoints.
And because the group is capped at 12, you’re not doing the whole “everyone fights for the same photo angle” routine. You’ll still want to be quick with your camera, but the vibe stays calm.
Other Arches National Park tours we've reviewed in Moab


Price and Value at $210: What You’re Really Paying For
$210 per person is a serious chunk of change for 4 hours 30 minutes. The value comes from what’s included, not from the clock.
Here’s what that price covers:
- A guide who runs the day and helps you understand what you’re seeing
- Ice, water, and snacks to keep you going
- Air-conditioned vehicle comfort
- Parking at the office before you depart
- Entrance fee handled for you, and no timed entry pass required for this tour
What’s not included:
- Lunch
- Breakfast
So for many people, the decision is simple: if you’d otherwise spend money on park access + pay time and fuel costs + stress over the route, this bundle starts looking more reasonable. If you’re the type who wants to roam slowly on your own schedule, you may prefer a cheaper self-drive day. But if you want a guided route that removes friction, this is priced like a convenience product with real substance.
Comfortable Vehicle Details That Matter in Moab Heat
This tour uses an air-conditioned vehicle, which sounds obvious until you’re standing in Moab sun and realizing your shade options are limited. Here, the ride keeps you from arriving at each stop already overheated.
You also get ice, water, and snacks, and you’re encouraged to bring a water bottle because there are free refills. That’s a small detail, but it changes how you plan your day. You don’t have to ration.
From the reviews, I also like the mention of big observation windows. Those windows matter because many of Arches’ best views are from near a turnout or overlook where you want to look without constantly squeezing past other people.
If you hate waiting around, the comfort helps you stay patient while the guide wrangles the group and keeps the timing moving.
Stop-by-Stop: The Route That Walks You Through Arches
This tour focuses on a loop of famous Arches features. You’ll spend time at multiple stops, with the guide pointing out what to look for and why each formation exists. The route includes the Windows section, Balanced Rock, Delicate Arch Overlook, Sanddune Arch, Panorama Point, La Sal Overlook, and Park Avenue.
Keep your expectations realistic: this is not a long hiking trek. Think short walks and viewpoint time, with enough movement to enjoy different perspectives without turning it into a full-day endurance event.
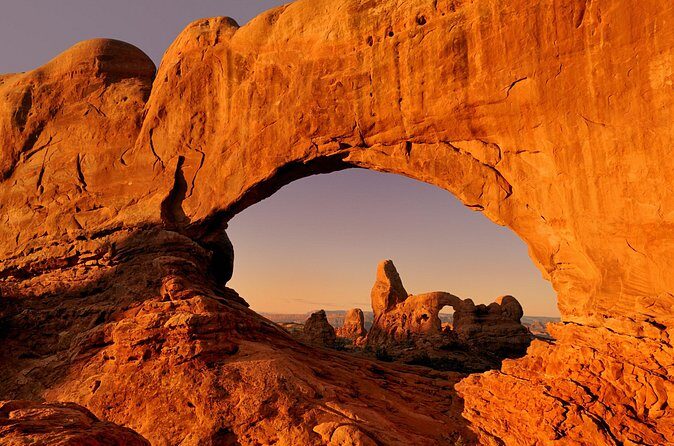
Windows Section: Where Framed Rock Views Start the Story
The Windows section is a great opener because it immediately shows you what makes Arches feel so iconic: natural frames. Look for the way the rock openings create “windows” onto the distance and how the formations change based on your angle.
This is also where a good guide earns their keep. A strong narration helps you connect what you see in front of you with the geology shaping the area. If you’re the type who usually glosses over explanations, I’d still give this first stop attention. It sets up the rest of the route.
A consideration: viewpoints here can be bright and exposed. Sunglasses and sunscreen aren’t optional. Bring them and use them early.
A few more Moab tours and experiences worth a look


Balanced Rock: The Quick Reality Check on Erosion
Next up is Balanced Rock, which has that classic “how is that still standing?” look. From a turnout area, you’ll get a close enough view to appreciate the scale and the weird imbalance that makes the formation famous.
What I like about hitting Balanced Rock early is that it gives you a geology anchor. You’ll start noticing how water, wind, and rock layers can create dramatic shapes. Even if you don’t remember the exact science terms, you’ll “get” the process.
The drawback is straightforward: you may want more time here, but the schedule moves onward. This isn’t a slow museum visit. It’s a guided highlights run.
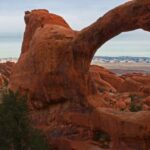
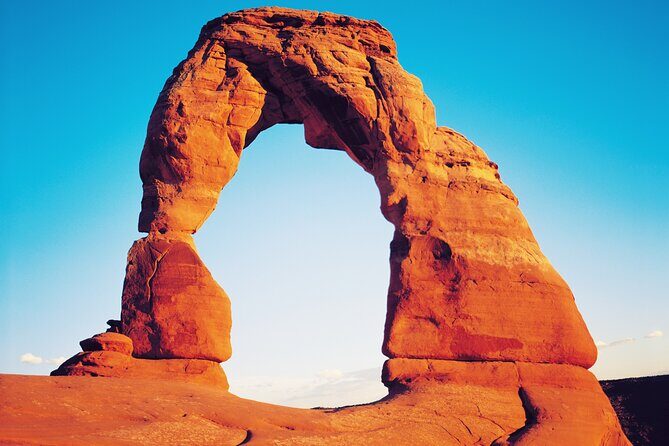
Delicate Arch Overlook: The Big Icon, Without the Long Standby
The Delicate Arch Overlook stop is usually a must for first-timers. You’re aiming at one of the most recognizable silhouettes in the park, and this is where it starts to feel like Arches is less “rocks” and more “a landmark shaped by time.”
What helps most is the guide’s framing. They’ll point out how the arch sits in relation to the surrounding rock, which makes your photos look better. You won’t just click and move; you’ll learn where to stand for the cleanest angles.
Consideration: this is a high-exposure area. If the sun is harsh, expect glare and bright heat. A hat or visor, plus sun protection, is your best friend.
Sanddune Arch: Small Detail, Strong Visual Payoff
Sanddune Arch is a nice contrast because it’s less of a “single giant poster arch” and more about textures and placement. Even if you’ve seen photos, being there adds the context: how the arch fits into the surrounding rock and how light plays across the formation.
This stop rewards the “slow down for 60 seconds” mindset. If you’re sprinting through everything, you’ll miss what makes it interesting. Give it a brief pause, look around, then take your shot.
The caution is practical rather than dramatic: the ground around Arches viewpoints can be uneven. Sturdy footwear matters because a wrong step is the last souvenir you want.
Panorama Point: Big Views Need Your Camera Ready
At Panorama Point, the payoff is wider perspective. This is the kind of stop where you step back from one formation and look at how Arches’ features relate to the rest of the park.
I like this part of the route because it changes your brain from “spot the arch” to “understand the area.” From a practical travel angle, it helps you orient yourself for future exploration.
Bring your camera and keep it handy. The lighting can shift quickly, especially if you’re there later in the day. If you wait until you’re already packed back up, you might miss your best light.
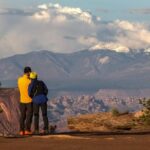
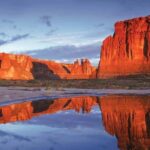
La Sal Overlook: A Break from Rocks Toward the Bigger Picture
The route also includes a La Sal Overlook stop. This is one of those moments when you remember Arches isn’t floating in a vacuum; it’s part of a larger regional view.
The guide can help you connect the distant shapes to what you’re seeing up close. That “zoom out” moment is a real mental reset, especially after stops filled with arch after arch.
This is also a good spot to breathe and just look for a minute. If you’re constantly chasing the next photo, you’ll miss the calmer awe that makes these parks special.
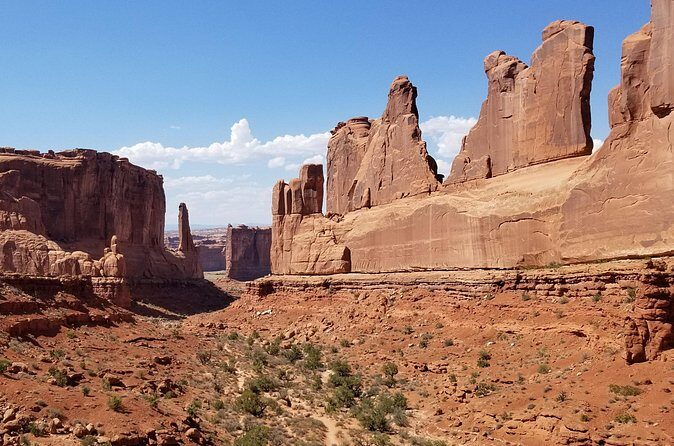
Park Avenue: The Alleyway Feel of Arches
Finally, Park Avenue rounds out the tour with a more “avenue” feel. You get dramatic rock walls that create a corridor effect, which changes how the air and light look compared to the open overlook zones.
I like this stop because it feels different in character. It’s not just about one arch. It’s about the space between rocks and the way erosion has carved this narrow, towering look.
Keep in mind it’s still outdoors in sun. You’ll want sunscreen and water strategy even if you think this is your last stop.
Guide Style: Why Bill and Phil Make the Day Feel Worth It
A big theme in the feedback is how the guide brings the park to life. Names like Bill and Phil show up in the stories people share, and the common thread is clear: the narration isn’t generic.
You should expect help with:
- Geological science tied to what you see
- Questions answered on the spot
- References to local flora and fauna, not just rocks
That matters because Arches can be visually stunning and still feel confusing if you don’t know what you’re looking at. A guide’s job is to translate time, erosion, and rock layers into something your brain can hold onto while you’re there.
If you’re on the fence about guided tours, this is a good example of one that pays off through explanation, not just sightseeing.
What to Bring for a Comfortable Arches Half-Day

You’ll have a vehicle and snacks, but you still need to show up prepared.
Use this as your packing baseline:
- A water bottle (free refills available)
- Sunglasses
- Sunscreen
- Visor/hat and sun protection
- Sturdy footwear for hiking on uneven ground
- A day pack
- Cameras and camcorders at your own risk
Also, plan for heat and glare. Arches doesn’t care that you forgot sunscreen.
If you’re bringing a camera, clean your lenses before you start. Dust and sun glare can ruin a perfect composition faster than you’d think.
Who This Van Tour Is Best For (And Who Should Skip It)

This tour is a strong fit if you:
- Want a guided highlights route through Arches National Park
- Prefer air-conditioned comfort between viewpoints
- Like learning how the formations work
- Want to avoid self-drive decision fatigue
It’s also a good choice if you’re traveling with mixed interests. The stops appeal visually, and the guide adds context for people who want more than just photos.
It’s not a good fit if you:
- Have motion sickness or vertigo (this is explicitly not recommended)
- Expect a long, independent hike day
One more note: because it needs good weather, don’t assume you’ll always get every plan. If conditions are poor, you’ll be offered a different date or a full refund.
Should You Book This Arches National Park Morning & Afternoon Van Tour?

I’d book it if you want the efficient, guided version of Arches. The price includes entrance, skips the timed entry pass requirement on this tour, and keeps you comfortable with water, ice, and snacks in a small group.
Skip it if you’d rather drive your own route slowly, or if the idea of a curvy ride and viewpoint stops doesn’t sit well with your body.
If you’re traveling in peak season, note that these tours tend to be reserved early, so locking in your date sooner rather than later is smart.
FAQ
How long is the Arches National Park morning and afternoon van tour?
The tour runs about 4 hours 30 minutes.
What does the tour cost?
It costs $210.00 per person.
Where do I meet for the tour in Moab?
You start at 378 N Main St, Moab, UT 84532, USA, and the tour ends back at the meeting point.
Is there a limit on group size?
Yes. The maximum group size is 12 travelers.
What language is the tour offered in?
The tour is offered in English.
Is timed entry required for this tour?
No. Timed entry tickets are not needed for this trip, and you will not need a timed entry pass (fee) when on this tour.
What’s included in the price?
The tour includes an experienced guide, ice, water, and snacks, air-conditioned transportation, parking at the office, and the entrance fee.
What isn’t included?
Lunch and breakfast are not included.
Is there a mobile ticket?
Yes. The tour uses a mobile ticket.
What should I bring?
Bring a water bottle (free refills available), sunglasses, sunscreen, sun protection (including a visor/hat), sturdy footwear for hiking, a day pack, and cameras if you want them.
Do I need to do anything the day before?
Yes. You are asked to call the office to reconfirm your reservation the day before your tour.