REVIEW · MOAB
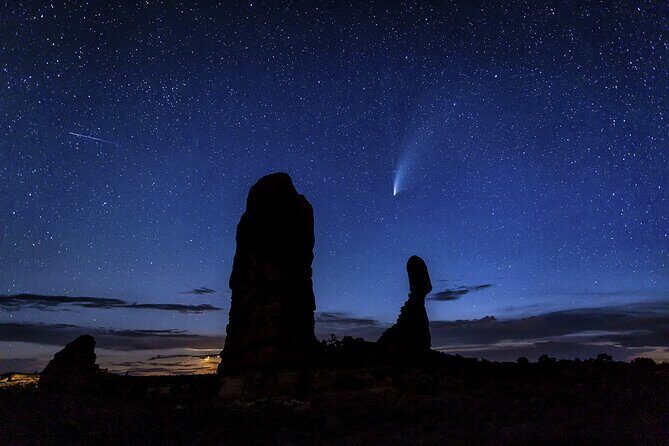
Milky Way Photography in Arches National Park
Book on Viator →Operated by Rock Light Photo Tours · Bookable on Viator
Night skies beat daylight.
This Milky Way photo outing turns Arches National Park into your classroom, with an easy crash course on camera settings and then real shooting time at dark-sky spots. You’ll work in low light with a guide who helps you aim for the kind of Milky Way photos most people only see in calendars.
I love that it’s practical, not theory-heavy. You get DSLR or mirrorless instruction (with a focus on settings) before you’re out under the stars, and that timing matters. I also like the extra support for non-expert photographers—people with cell phones or no camera gear still get a sky show, even if the star files come out more modest.
One thing to consider: this is a late-night mission. In March through May, the Milky Way doesn’t show up until after midnight, so you’ll be doing a wee-hours tour (late pickup). If you’ve got poor night vision, or you don’t want to stand around in the dark with a tripod, this won’t feel worth it.
In This Review
- Key takeaways before you go
- From Moab to Arches: why this Milky Way tour feels different
- When the Milky Way shows up (and why you’ll start late)
- Your Arches night stops: what you’re really doing at each location
- The “crash course” part: settings first, stars second
- Gear checklist you actually need (and what to borrow)
- Small-group teaching: what support looks like in the dark
- Snacks, water, and staying comfortable for 3.5 hours
- Pricing and value: what $275 buys you here
- Who should book this, and who might skip it
- Should you book Rock Light Photo Tours for Arches?
- FAQ
- Meeting point and end location
- Where do I meet the guide?
- Where does the tour end?
- Time, group size, and language
- How long is the tour?
- How many people are in the group?
- Is the tour in English?
- Camera, lenses, and tripod
- Does the tour include a camera?
- What camera and ISO do I need?
- What lens should I bring?
- Do I need a tripod?
- What’s included
- Are snacks and water included?
- What should I bring for visibility in the dark?
- Seeing the Milky Way
- When can I expect to see the Milky Way?
- Cancellation and confirmation (brief)
- Do I get confirmation after booking?
Key takeaways before you go
- Two (or more) Milky Way locations inside Arches means you’re not just taking one photo and hoping for the best.
- Small group size (up to 4) keeps the teaching focused, so you can get help tweaking settings.
- Late-night timing rules apply in spring, with the Milky Way appearing only after midnight from March to May.
- Gear matters: you’ll get the best results with a sturdy tripod and a wide-angle lens that opens to at least f/3.5.
- You bring your own camera and lens, but the guide may help with a tripod if you’re short on gear.
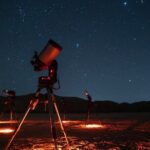
From Moab to Arches: why this Milky Way tour feels different
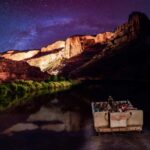
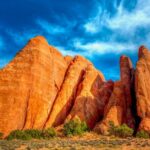
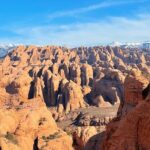
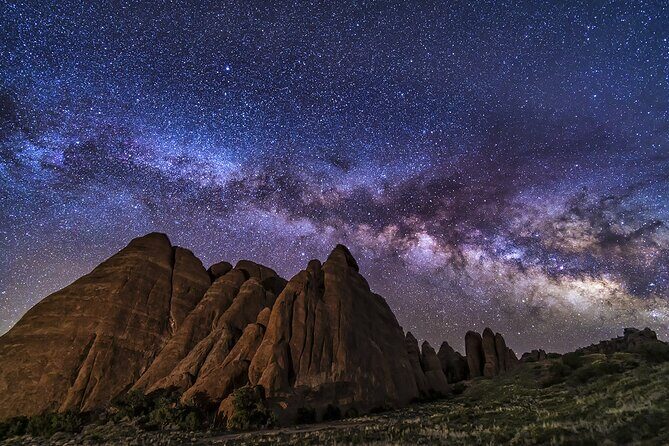
Moab is built for outdoor people. But at night, it becomes something else—quiet and dark enough to make the Milky Way feel close. That’s the point here: you’re not just watching stars. You’re learning how to photograph them in a place that’s officially recognized for dark skies.
Rock Light Photo Tours keeps it small (maximum 4 people). That matters because Milky Way photography isn’t “press one button and win.” You’ll likely need adjustments: exposure time, ISO, focus, and composition. When the group is small, the guide can help you steer rather than lecture from a distance.
I also like that the tour is set up for different skill levels. If you’ve never touched astrophotography before, you still get a straightforward starting point. If you’re already comfortable with manual modes, you’ll get nudges toward settings that fit what you’re seeing in the sky.
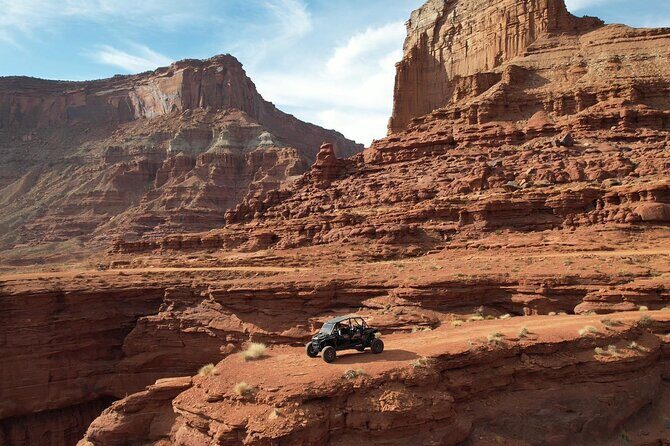
Other Arches National Park tours we've reviewed in Moab

When the Milky Way shows up (and why you’ll start late)

Timing is everything for night sky photography, and this tour is honest about it. During March through May, the Milky Way doesn’t appear until after midnight. That means this is a late night / standalone tour in that season, and you should expect a late pickup.
During the fall, the Milky Way tour is offered as a combo with sunset + night. That’s useful because you’ll already be oriented in the park before dark, and you can ease from daylight into the long-exposure world.
Practical tip: plan your energy like you plan your camera. This is not a quick evening stroll. It’s 3.5 hours (about) of low-light work, so wear layers, and bring something warm for the time after midnight when you’ll likely feel it most.
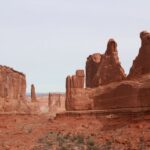
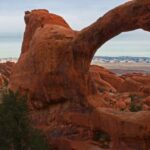
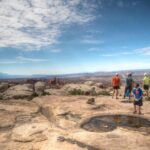
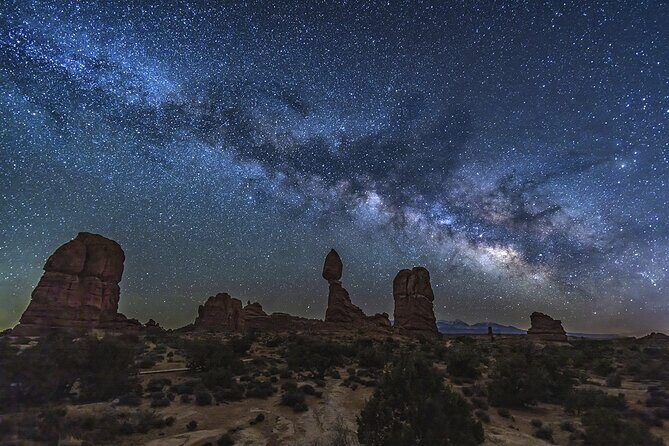
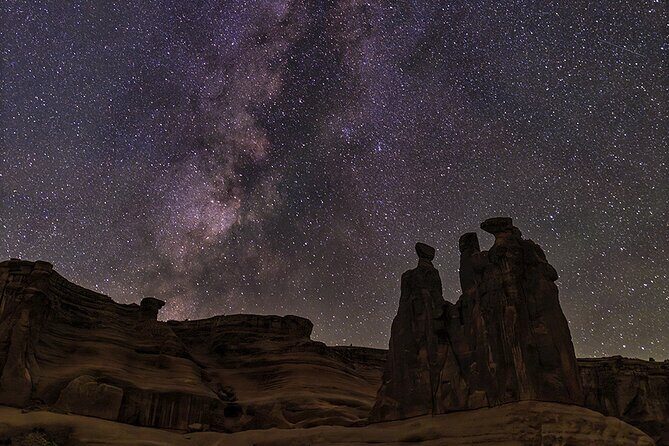
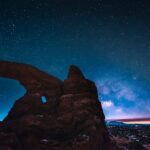
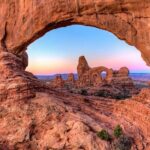
Your Arches night stops: what you’re really doing at each location
You’ll meet at the Moab Information Center, then head into Arches National Park for Milky Way photography. The plan is to shoot at at least two locations in the park, which is a big deal for your results.
Here’s why two spots help:
- You can compare compositions. One area might give you cleaner sky. Another might frame the Milky Way with different rock formations.
- If conditions are slightly different (horizon height, light pollution direction, cloud cover), you get more chances to nail a frame.
At each location, the goal is simple: get you set up, get the camera aimed, and get you focused enough to capture stars—not just blurry pinpoints. You’ll also get suggestions for how to position your wide-angle lens so the sky has meaning in the shot, not just a random strip of stars.
Keep expectations grounded: you’re working outdoors at night. The Milky Way will be visible, but getting a strong photo depends on steady support and correct settings. The tour gives you time to troubleshoot, which is exactly what you want on your first go.
The “crash course” part: settings first, stars second
Most people lose their shots because they start with the wrong settings and then spend the rest of the night chasing fixes. This tour flips that order.
You’ll get instruction on how to capture the Milky Way with a DSLR or mirrorless camera, focused on practical settings you can apply immediately. The tour is designed around your camera’s ability to handle low light—especially the part about high ISO and longer exposures.
Also, the tour doesn’t treat every camera the same. You’ll have a device capable of shooting at least 3200 ISO (that’s part of the requirement). You’ll also need a wide angle lens that can open to f/3.5 or lower. Translation: you’re collecting enough light to make star detail show up in a reasonable exposure time.
If you’re the kind of person who likes to prepare, you might also find that the guide sends a pre-tour instruction sheet so you can set up basic settings before you ever arrive. That’s a great move because it cuts down your learning curve while you’re standing in the dark.
Gear checklist you actually need (and what to borrow)
This tour gives you instruction and a plan—but you still need to bring your own tools.
Bring:
- DSLR or mirrorless camera (capable of at least 3200 ISO)
- Wide-angle lens
- Full frame: roughly 14mm to 35mm
- Crop sensor: roughly 10mm to 24mm
- Ideally f/3.5 or lower
- Sturdy tripod
- Headlamp or flashlight with a red setting (if you have one)
The tour does not provide cameras. If you don’t have a tripod, the guide may be able to loan a spare one, but don’t count on it. If tripod gear is a weak spot for you, bring one if you can.
Cell phone reality check: the tour notes that late-model iPhones or other advanced phone cameras may be able to capture the Milky Way. That’s encouraging, but phone performance varies a lot. Plan to use your phone for the “I was there” memory, not guaranteed astrophotography results—unless you already have night-sky shooting experience on phones.
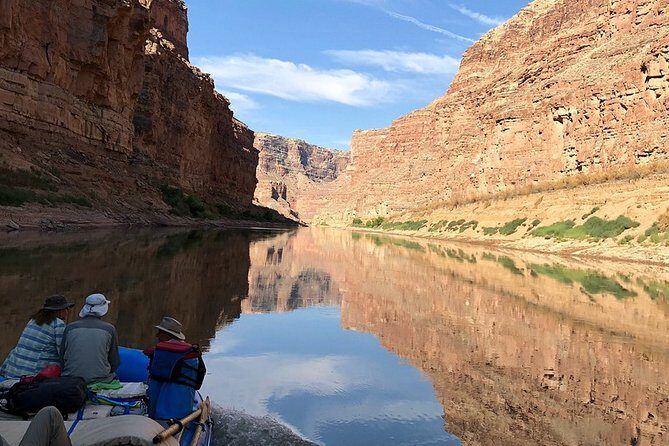
Other photography tours in Moab

Small-group teaching: what support looks like in the dark
Night photography support can be either helpful or just confusing. Here, the emphasis is on getting you to a usable setup quickly.
Because the group is limited, you’re more likely to get hands-on help when you’re struggling with focus, exposure, or composition. I also like that the guide offers composition ideas rather than only camera numbers. Star photos can look sterile if the foreground isn’t intentional, so having suggestions for framing makes a difference.
The teaching approach tends to be patient and question-friendly. On nights like this, your best tool is not fancy gear—it’s the ability to ask, adjust, and try again. With a small group, your questions have room to land.
And yes, you can still enjoy the tour even if your gear situation isn’t perfect. The tour explicitly mentions that people without cameras (or only using cell phones) can enjoy the sky. That makes it feel less like a workshop where only gear owners win.
Snacks, water, and staying comfortable for 3.5 hours
You’ll get snacks (including gluten-free options) and bottled water. The guide brings a cooler full of ice water so you can refill reusable bottles.
That’s not a small detail. Milky Way photography is long on waiting and short on movement. Being hungry or dehydrated will drain you fast, and you’ll feel it more in the cold after midnight.
Bring warm layers and plan for chilly hands if you’re tweaking settings on a tripod. Your camera may be fine, but your body might not be.
Pricing and value: what $275 buys you here
At $275 per person, you’re paying for two things that are hard to replace on your own: time and coaching.
If you just show up at Arches at night, you can technically attempt Milky Way shots. But you won’t get:
- a focused crash course on settings
- a plan for where to shoot within the park
- help correcting common beginner issues (especially focus and exposure)
- a small-group atmosphere that keeps instruction from feeling generic
Also, the tour includes basic support items like snacks and water, plus instruction once you’re there. The camera gear stays on you, though, so factor that into the real cost if you don’t already own a wide-angle lens and tripod.
One more practical value angle: the tour is booked about 57 days in advance on average. That suggests popular dates can fill, especially around new opportunities to see the Milky Way well. If you want a specific night, don’t wait for the last minute.
Who should book this, and who might skip it
This tour fits best if you:
- want your first Milky Way photos to come out better than random nighttime attempts
- have a DSLR or mirrorless and a wide-angle lens
- can stand and work near a tripod in the dark for about 3.5 hours
- want to learn directly from a guide, not just read settings online
I’d be cautious if you:
- have poor night vision (the tour is not recommended for that)
- don’t want late-night timing in spring
- don’t have (or aren’t willing to rent/buy) a tripod and suitable lens
It’s also worth noting that the tour is in English and is kept to a maximum of 4 people, which usually means a more controlled, teachable pace.
Should you book Rock Light Photo Tours for Arches?
If your goal is real Milky Way photos—not just star gazing—this is a strong match. The combination of camera instruction, a small group, and multiple shooting locations is exactly what you want when you’re trying to translate sky brightness into a camera file you’ll actually be proud of.
I’d especially book it if:
- you’ve got the right camera type and lens, and you want help getting the settings right
- you’re visiting Arches for the first time and want to see why dark-sky parks matter
- you’re okay with a late start, especially in March through May
But if the idea of midnight shooting sounds miserable, or if you’re missing core gear like a tripod and wide-angle lens, you may be happier with a simpler stargazing option and save your camera learning for another trip.
FAQ
Meeting point and end location
Where do I meet the guide?
You meet at the Moab Information Center, 25 E Center St, Moab, UT 84532.
Where does the tour end?
The activity ends back at the meeting point.
Time, group size, and language
How long is the tour?
It’s about 3 hours 30 minutes.
How many people are in the group?
The tour has a maximum of 4 travelers.
Is the tour in English?
Yes, the tour is offered in English.
Camera, lenses, and tripod
Does the tour include a camera?
No. You bring your own DSLR or mirrorless camera (or you can try with a phone if it’s capable).
What camera and ISO do I need?
Bring a DSLR or mirrorless camera capable of shooting at least 3200 ISO.
What lens should I bring?
A wide angle lens is best, roughly 14mm–35mm on a full frame (or 10mm–24mm on a crop sensor) and capable of opening to at least f/3.5 or lower.
Do I need a tripod?
Yes, a sturdy tripod is required. If you do not have one, the guide may be able to loan a spare tripod.
What’s included
Are snacks and water included?
Yes. You get snacks (with gluten-free options) and bottled water. The guide provides a cooler of ice water for refills.
What should I bring for visibility in the dark?
Bring a headlamp or flashlight, ideally one with a red setting.
Seeing the Milky Way
When can I expect to see the Milky Way?
In March through May, the Milky Way doesn’t appear until after midnight, so the tour starts late. In fall, the Milky Way experience is offered as a sunset + night combo.
Cancellation and confirmation (brief)
Do I get confirmation after booking?
You receive confirmation within 48 hours of booking, subject to availability.