REVIEW · MOAB
Day of Photography in Moab, Arches & Canyonlands
Book on Viator →Operated by Rock Light Photo Tours · Bookable on Viator
Moab gets better with a camera coach. This 9–11 hour day with Rock Light Photo Tours turns Arches and Canyonlands into a hands-on photo workshop, with a max group of six so instructor Colin can actually coach your framing. One thing to plan for: Arches National Park admission isn’t included, so you’ll want a park pass (or budget to buy one).
I also like how the tour handles the practical stuff for you: water and snack bars keep energy up, and you get a timed entry permit for Arches. That means less time stuck on logistics and more time learning how to see the scene in front of you.
In This Review
- Key highlights to know before you go
- A Small-Group Photo Class Inside Two Big Parks
- Pickup in Moab: What the Limited Vehicle Means for You
- Dead Horse Point State Park: Viewpoints, Timing, and Easy Walking
- Canyonlands: Flexible Stops and How Colin Helps You Choose Angles
- Arches National Park With Timed Entry Permit and Crowd Avoidance
- Potash Road Petroglyphs on the Way Back
- The Photo Instruction: Settings, Framing, Tripods, and Humor
- Costs, Park Passes, and What You Need to Bring
- Who Should Book This Moab Photography Day
- Should You Book This Moab Photography Day?
- FAQ
- How long is the Moab day photography experience?
- How much does it cost?
- What parks and locations are included?
- Is park admission included?
- Is pickup available in Moab?
- How many people are in the group?
- What fitness level do I need?
- What happens if the weather is bad?
- Is there free cancellation?
Key highlights to know before you go
- Small group size (up to six) keeps instruction personal and fast
- Timed entry permit for Arches included, but Arches admission still requires a park pass
- Dead Horse Point State Park and Potash Road stops add variety beyond the headline arches
- Colin teaches camera basics in the field: settings, framing, timing, and tripod use
- Canyonlands photo stops can shift based on weather and time
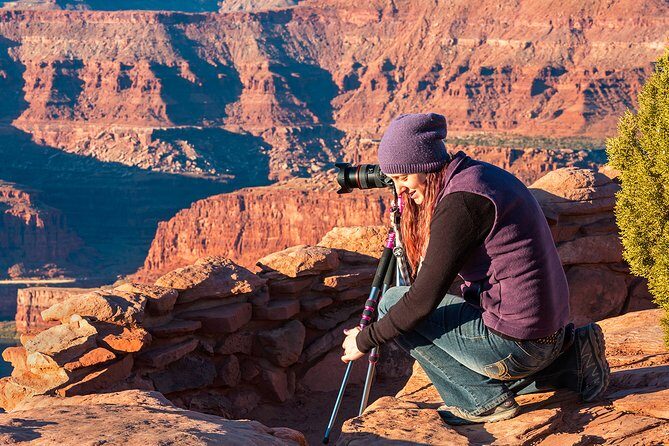
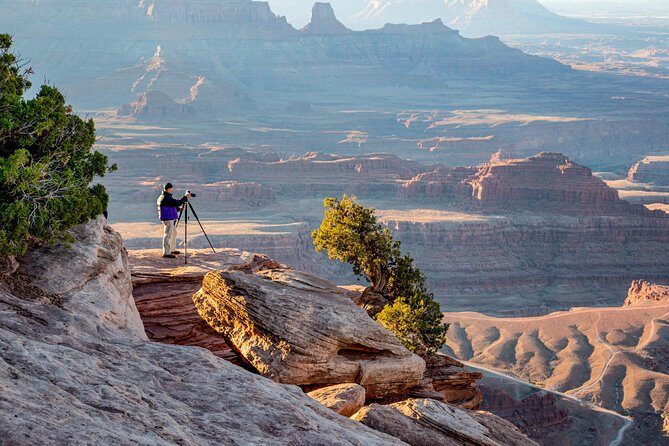
A Small-Group Photo Class Inside Two Big Parks
This tour works because it treats photography like a skill, not a sightseeing checklist. You’re not just driving to viewpoints and snapping quickly. Colin focuses on what to notice first—light, foreground, angles, and how to build a shot—then guides you step-by-step as you try it.
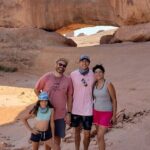
The big win for most people is the group size. With only up to six participants, you get real attention. If you ask a question, you don’t have to wait your turn for the next stop. Colin can also tailor advice to beginners and more experienced shooters in the same group, which matters because everyone’s camera habits are different.
Also, this is one of the more efficient ways to see three areas in a single day: Dead Horse Point, Canyonlands, and Arches, plus a quick cultural stop on Potash Road. It’s not a low-effort walk. It is a long day with short hikes and plenty of standing around getting the shot—but the tradeoff is that you come away with new ways to see and shoot.
Other Arches National Park tours we've reviewed in Moab

Pickup in Moab: What the Limited Vehicle Means for You
Moab is spread out, so pickup saves real time—if you’re in the first few spots. This tour offers pickup, but the provider notes room for only the first 4 passengers plus gear in their vehicle. After that, you’ll drive your own car and follow the guide.
You can also meet at practical locations in Moab, such as the Moab Information Center (25 E Center St) at the start, and the tour ends back at the meeting point. Pickup can be arranged at many hotels or campgrounds in Moab, with the note that Castle Valley is not included.
My practical advice: if you have a camera tripod case or heavier gear, claim pickup early. If you’re driving yourself, plan to arrive a little early and keep your camera ready—getting in position for early light is part of the day’s rhythm.
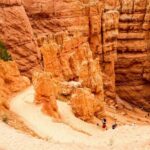
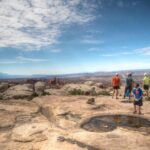
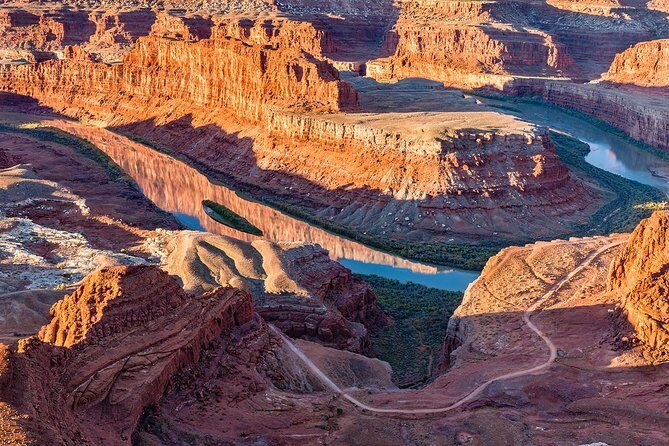
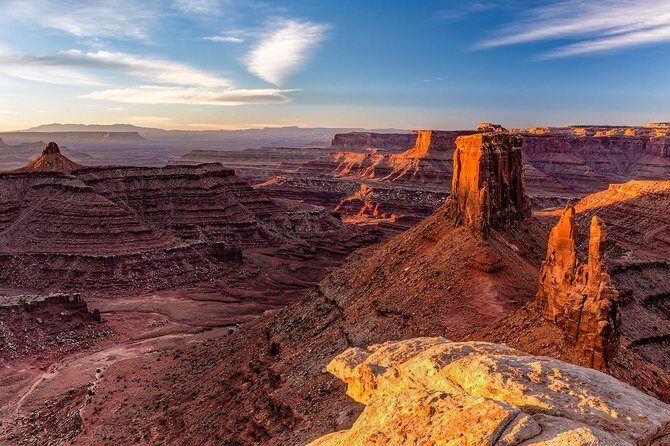
Dead Horse Point State Park: Viewpoints, Timing, and Easy Walking
Dead Horse Point is a strong start because it gives you big, dramatic edges and long-view framing. You’ll photograph from several viewpoints around the point, and the stop is about 1 hour 30 minutes with admission included.
This is also a good warm-up for the photo instruction. You can practice moving your viewpoint slightly—higher, lower, farther back—and notice how that changes the story of the scene. Even if you’re new to cameras, it’s easier to learn composition when you’re surrounded by clear opportunities: layered rock formations, open sky, and high-contrast lighting.
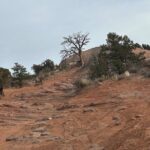
The walking here is typically manageable, but you should still be prepared for uneven ground and standing time. The tour overall calls for moderate fitness, with some locations requiring short hikes under 1 mile, so bring shoes that handle rocky or sandy surfaces without slipping.
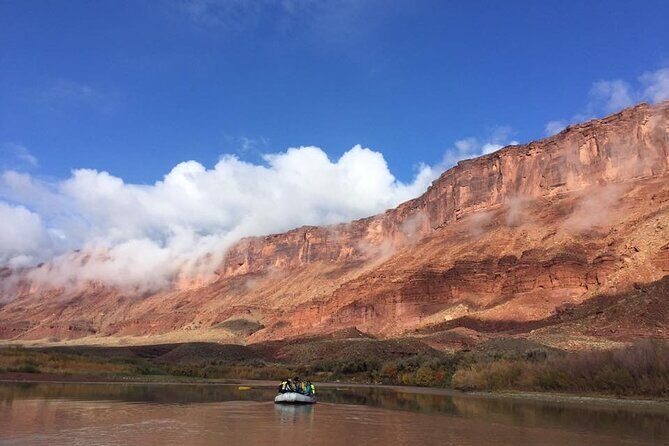
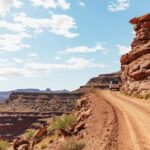
Canyonlands: Flexible Stops and How Colin Helps You Choose Angles
Canyonlands National Park is where the day starts feeling like a real photo “safari,” but with room for adjustment. The plan is about 2 hours, and you’ll stop at 2–3 locations depending on weather and time.
That flexibility matters. In Moab, the best light can depend on clouds, wind, or changing conditions, and certain overlooks might be easier when roads are clear and crowds are behaving. Instead of forcing you through a rigid script, Colin can shift to what works that day.
In the field, Colin’s approach is practical: he helps you work through the basics of exposure and composition without turning it into a classroom lecture. You might get guidance on camera settings, and you’ll also learn how to think about timing—when to shoot, when to wait for the light to change, and how to avoid rushing your frame.
Canyonlands is also a spot where people tend to over-reach for the first impressive view they see. Colin’s value is pushing you to build a stronger shot—something with foreground interest, better separation of layers, and a cleaner way to lead the viewer’s eye.
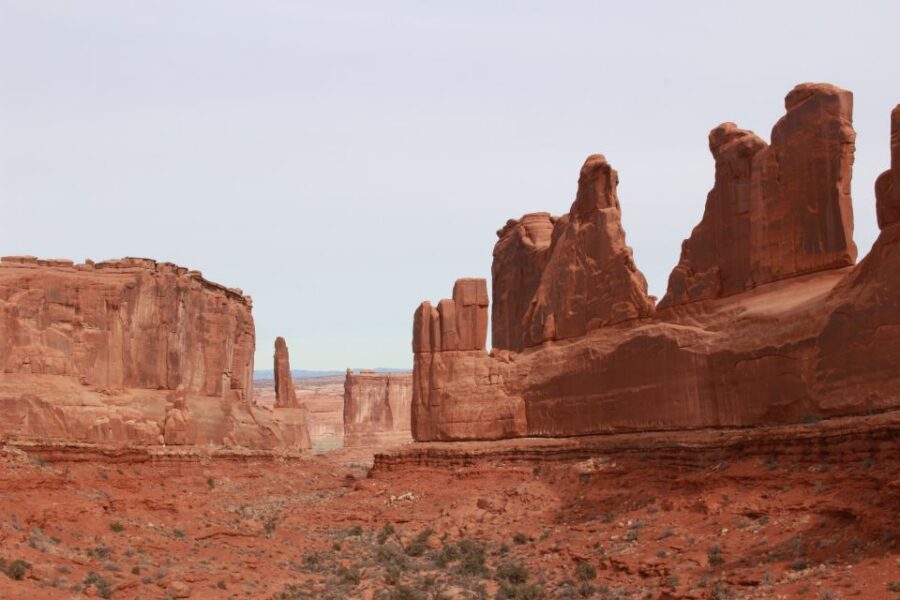
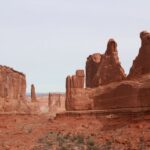
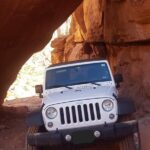
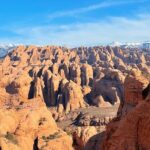
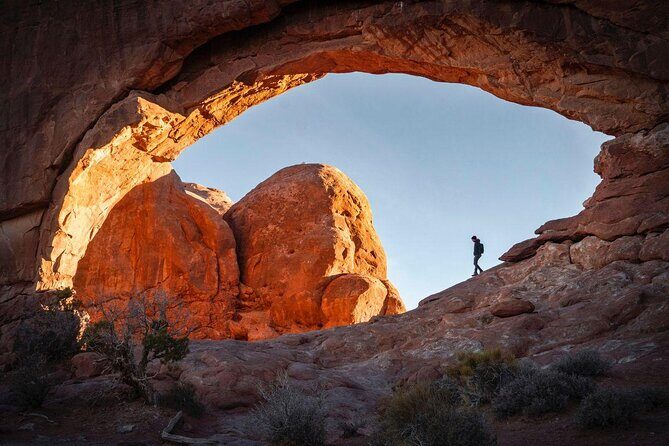
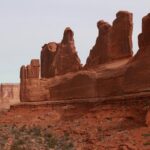
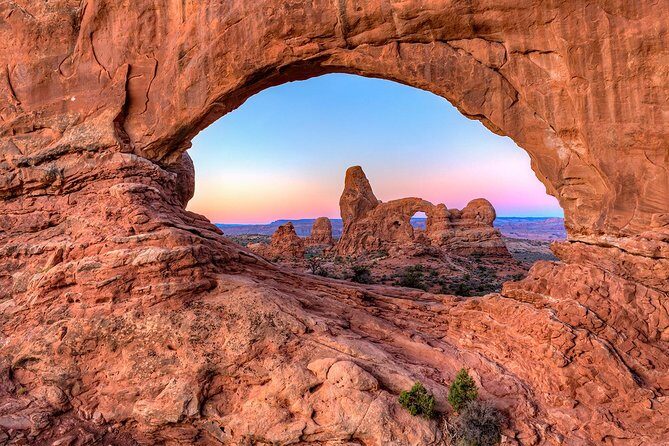
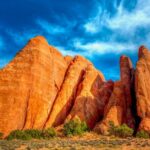
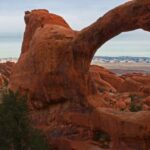
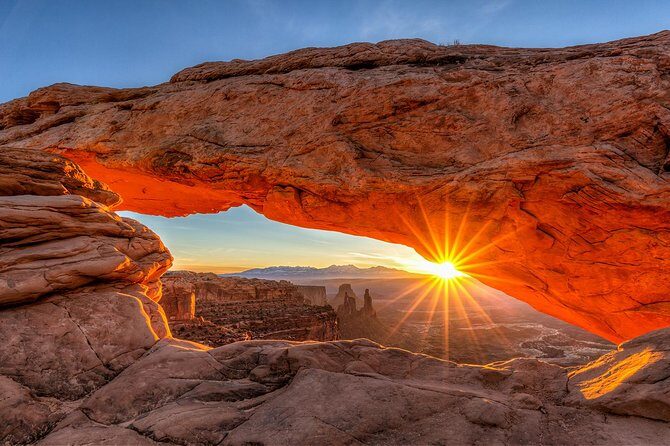
Arches National Park With Timed Entry Permit and Crowd Avoidance
Arches National Park is the headline, and you’ll spend about 4 hours here. You’ll photograph iconic arches and rock formations, and the plan calls out trying to visit more out-of-the-way locations because Arches can be busy.
You also get a timed entry permit included for Arches, which is a real benefit. Even if you have good navigation skills, timed entry helps you stay on schedule. Still, here’s the key cost detail: Arches admission is not included. Bring your park pass, or plan to buy entry at the booth when you arrive.
What I think makes this stop worth the extra structure is that the guide isn’t just showing you where to stand. Colin helps you experiment with angles—moving a few steps can turn a cluttered shot into something clean. In one of the most useful lessons people pick up, you’re encouraged to use composition tools actively: framing the arch with surrounding rock, watching how the background sky looks, and adjusting how your camera captures depth.
If you’re traveling in a short window, Arches plus Canyonlands plus Dead Horse Point in one day is a lot of geography. The tradeoff is that you’re not doing long hikes. You’re doing more photography per hour, which tends to suit travelers who want the highlights without losing the whole day to foot travel.
Other Canyonlands National Park tours we've reviewed in Moab

Potash Road Petroglyphs on the Way Back
On the way back, the tour includes an optional time permitting stop at an ancient petroglyph site along Potash Road. The window is about 20 minutes, and admission is included.
This quick stop is a nice balance after big viewpoints. It’s not a long detour, so you don’t lose the energy you built in the parks. It also gives your day more variety than just rock towers and arches.
Because the time is short, treat this as a focused visit: look first, then photograph with care. If you want a truly compelling shot, you’ll likely need to slow down your setup. The guide’s habit of coaching timing and framing here can help you get more from a short stop—especially if you’re trying to capture details without rushing.
The Photo Instruction: Settings, Framing, Tripods, and Humor
The best part of this experience is that instruction is happening while you’re actually shooting. Colin teaches in the field, and it’s more than just pointing at a view. You get hands-on guidance that many people describe as turning their camera into something they understand.
You can expect coaching on things like:
- Aperture, shutter speed, and ISO
- Shooting mode
- Timing
- Tripod use
- Framing tips to help your images look intentional, not accidental
This is where value shows up. If you’re brand new, you might need help just getting consistent results. If you’re more advanced, Colin can still refine what you’re doing—like how to use your tripod for stability or how to plan a shot instead of spraying frames.
There’s also room for humor in how the day runs. One fun teaching moment is Colin arranging participants for playful photos, like pretending to hold up rocks or arches. That kind of lighthearted vibe matters more than you’d think. It reduces camera nerves and makes people more willing to try different compositions instead of freezing at the first frame.
Costs, Park Passes, and What You Need to Bring

The price is $395 per person, and that feels fair when you consider what’s included and the small-group format. You get cold water and snack bars, plus a timed entry permit for Arches, and you don’t have to worry about some admissions: Dead Horse Point State Park is included, and Potash Road’s petroglyph stop includes admission. Canyonlands National Park admission is noted as free for this stop.
The part to watch is the big one: Arches National Park admission is not included. So if you already have a park pass, you’re in a good spot. If you don’t, plan to buy entry when you arrive at Arches so the day doesn’t end with an unpleasant surprise.
What to bring is simple, but don’t skip it:
- A camera and any basics you know how to adjust (and if you don’t know them yet, that’s fine)
- A tripod if you use one (Colin covers tripod technique)
- Comfortable shoes for short rocky walks
- Sun protection and layers for changing conditions
Also, this is a good-weather dependent experience. If conditions aren’t right, you’ll be offered another date or a full refund, so don’t plan other tightly timed commitments right after.
Who Should Book This Moab Photography Day
This is best for people who want more than photos—they want better photos. If you’re using more than a point-and-shoot, or you’re ready to learn how to control settings, you’ll get a lot out of Colin’s in-field guidance.
It also fits beginners who can follow steps and ask questions. Multiple people mention getting real value even with simple cameras, as long as they come ready to learn basic adjustments and composition.
If your plan is hiking-heavy with long trails, this tour may feel too focused on short stops and viewpoints. On the other hand, if you have limited time and want the major sights of Moab’s park system—without doing extensive hiking—this is a strong match.
One more practical fit note: the tour caps at six travelers, which helps with learning and pacing. If you like structured days with room to explore your own ideas, you’ll likely enjoy it.
Should You Book This Moab Photography Day?
If you want a guided day that teaches you how to think like a photographer, this is a smart way to spend $395. The combination of small group attention, hands-on coaching from Colin, and included support (water, snacks, and a timed entry permit) makes it more than just a driving tour.
Skip it only if you hate long days or you’re looking for major trail mileage. Also, double-check that you’re comfortable paying Arches admission separately (bring a park pass if you can). If that cost detail works for you, this tour is a great bet for turning a single day in Moab into real skills you can use on every future trip.
FAQ
How long is the Moab day photography experience?
The tour runs about 9 to 11 hours. The exact timing depends on the day’s lighting, weather, and how much time the group needs at each location.
How much does it cost?
It costs $395.00 per person. Water and snack bars are included, and a timed entry permit for Arches is included, but Arches admission is not included.
What parks and locations are included?
You’ll stop at Dead Horse Point State Park, Canyonlands National Park, and Arches National Park, plus a time-permitting stop at a petroglyph site along Potash Road on the way back.
Is park admission included?
Dead Horse Point State Park admission is included, Canyonlands admission is free for the stop, and Potash Road petroglyph admission is included. Arches National Park admission is not included, so you’ll need a park pass or buy entry when you arrive.
Is pickup available in Moab?
Pickup is offered, but the provider notes they can only drive the first 4 passengers plus gear in their vehicle. Others will need to drive their own car and follow. Pickup may be arranged at hotels or campgrounds in Moab (not Castle Valley).
How many people are in the group?
The tour has a maximum of 6 travelers. That small cap is part of how Colin can give more focused help on composition and camera settings.
What fitness level do I need?
The tour is listed as suitable for moderate physical fitness, with short hikes under 1 mile required for some locations. Good shoes help because terrain can be rocky.
What happens if the weather is bad?
This experience requires good weather. If it’s canceled due to poor weather, you’ll be offered a different date or a full refund.
Is there free cancellation?
Yes. You can cancel for a full refund up to 24 hours before the experience starts. If you cancel less than 24 hours before, the amount paid is not refunded.