REVIEW · MOAB
Astro-Photo, Hiking and Stargazing Tour in Arches National Park
Book on Viator →Operated by Moab Dark Sky Tours · Bookable on Viator
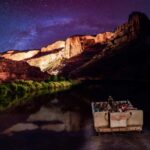
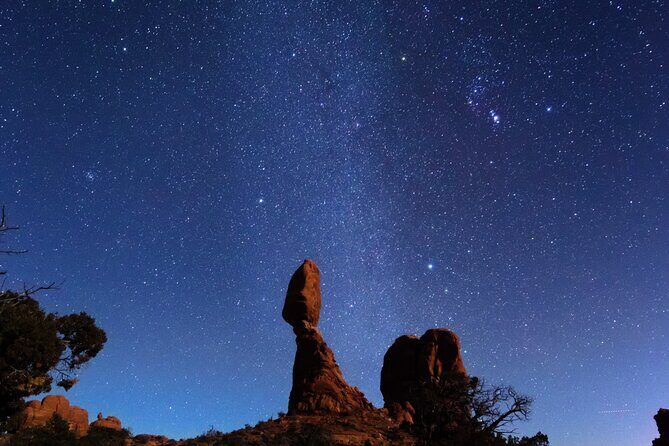
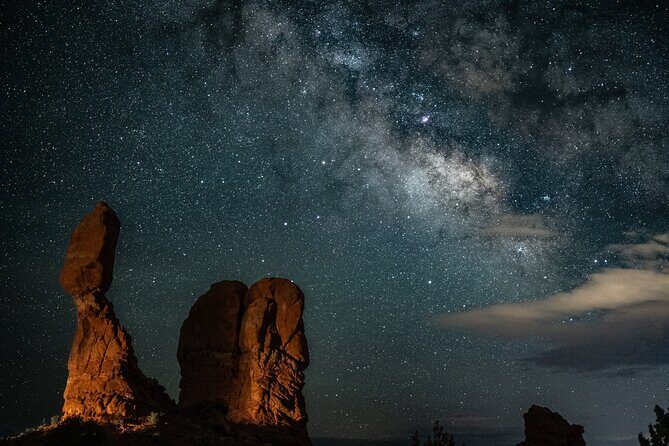
Milky Way over Arches is not ordinary. This Arches National Park night tour turns a short hike into a practical astrophotography session, using provided headlamps and tripods so you can actually focus on the sky instead of fumbling in the dark. I also like that the guides work with real setups for both phones and cameras, with tips that help first-timers get sharp, shareable stars.
One thing to plan for: the drive to the park area at night can feel tricky, especially if this is your first day in Moab. And if you are expecting big telescope optics, keep your expectations grounded in what you’ll be using—photo-focused gear for night skies, not a fancy viewing scope.
In This Review
- Key points I’d highlight before you go
- Arches National Park After Dark: Why this 2-hour format works
- Meeting at the Windows Section Parking Lot: quick start, less hassle
- The photo setup: headlamps, tripods, and real tips for phones
- Stop inside Arches National Park: arches as framing for stars
- Cold air, no crowds, and the feeling of owning the sky
- Guide impact: why the right person matters for night photography
- Price and value: is $175 per person fair?
- Who this tour is best for (and who should reconsider)
- Practical tips so you get the best photos
- Should you book this Arches astro-photo hike?
- FAQ
- How long is the Astro-Photo, Hiking and Stargazing Tour in Arches National Park?
- Where does the tour meet and where does it end?
- Is park admission included?
- What equipment do you get for photographing the stars?
- Do you need a specific camera to participate?
- What happens if the weather is bad?
Key points I’d highlight before you go

- Up to 6 people means you’re not lost in a crowd while trying to frame shots.
- Provided night gear (including headlamps and tripods) keeps the process safer and steadier.
- Constellations + camera coaching make it useful even if you’ve never done night photography.
- Zero-crowd timing helps you feel the park shift after dark, with cooler evening temperatures.
- Windows Section access keeps the meet-up close to trails, so less time is wasted getting ready.
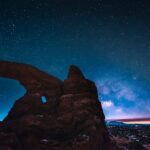
Arches National Park After Dark: Why this 2-hour format works
An Arches at-night experience is different in a way that daylight just can’t match. The rock shapes still look like rock shapes, sure. But after dark, your attention flips. You start noticing how arches line up with stars, how the sky becomes the main character, and how the whole scene changes as the minutes pass.
This tour keeps things to about 2 hours, and that’s a sweet spot for most people. It’s long enough to settle in, get your bearings, and take multiple attempts at photos. It’s short enough that you don’t feel frozen or cranky before you even get your best shots.
You also get the benefit of cooler nighttime air. In a place like Moab, where daytime heat can be intense, that matters. Better comfort means you last longer outside, and you’re more likely to experiment instead of packing it in after one quick try.
Other Arches National Park tours we've reviewed in Moab

Meeting at the Windows Section Parking Lot: quick start, less hassle
The meet-up is at the Windows Section Parking Lot in Utah (the tour ends back at the same place). That location choice is practical. It’s near trail country, so you spend more time walking and photographing and less time commuting around once the lights are low.
You’ll want to arrive with the mindset that you’re starting a nighttime walk, not a sightseeing drive. Even if you’re an experienced traveler, darkness makes everything feel slower. The upside: once you’re set up, the group can move calmly and you get enough time at each photo moment.
If you’re planning to visit Arches on your first park day, I’d take the note about night roads seriously. Dark driving can be harder than you expect, particularly if you’re still learning local routes. If you can, give yourself a little buffer and come in rested.
The photo setup: headlamps, tripods, and real tips for phones
This tour earns serious praise for photo help that feels hands-on, not lecture-only. You’re given photo equipment designed to support night work—specifically headlamps and tripods mentioned in guest feedback. That combination matters. At night, the hardest part isn’t aiming your lens. It’s staying stable and keeping your gear pointed where you intend.
Even better: you’re not treated as a specialist. Guides help you dial in phone and camera settings, and they do it in a way that works for people without an SLR camera. If you have only a phone, that’s good news. Night sky photos can look disappointing when you don’t know the basic tricks, but coaching makes a huge difference.
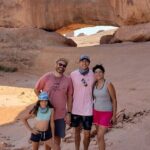
I love that patience showed up in the feedback, including support for kids and first-time photographers. One family even mentioned help turning their phone into a star-photo tool, including a fun mascot picture idea. That tells me the guide energy is practical and friendly—not just “stand there and hope.”
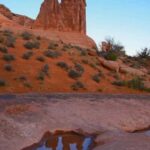
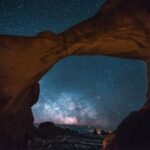
Stop inside Arches National Park: arches as framing for stars
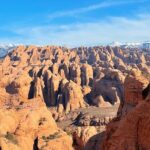
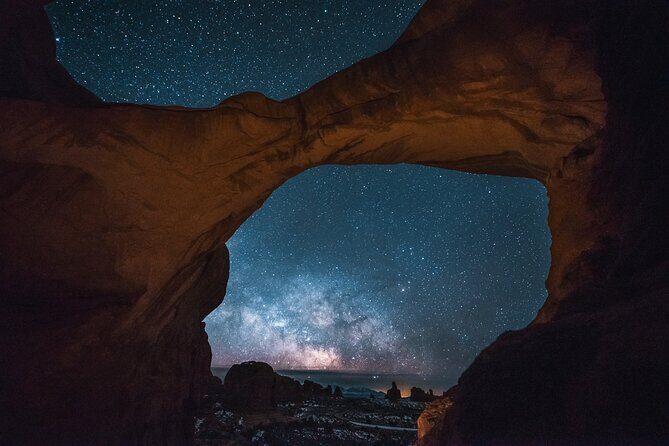
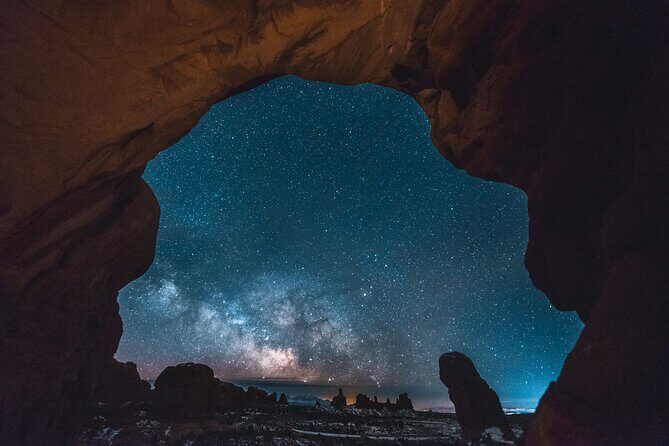
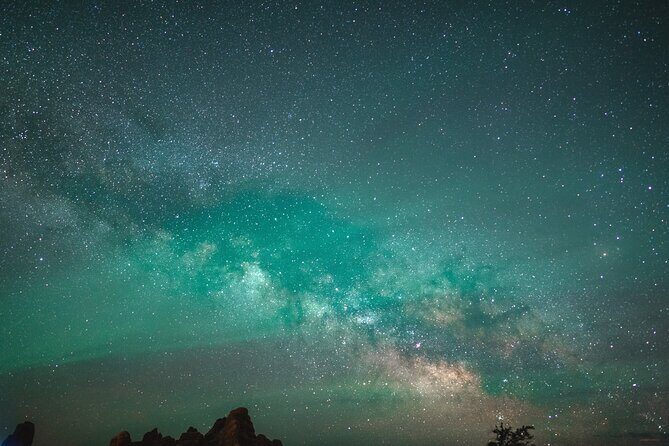
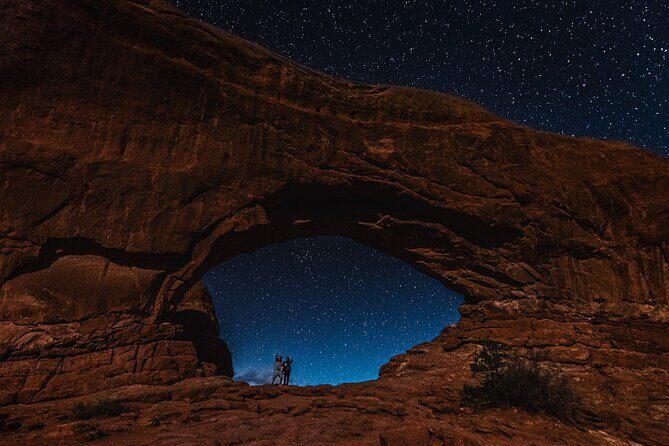
Your main stop is Arches National Park, with the tour working through a rock-garden style route where arches and star patterns line up as you go. The best part is the “after dark transformation” feeling: arches stop being just rock art and start acting like natural picture frames.
You’ll hear about the sky’s motion as the night progresses—guests describe the experience as watching the galaxy rotate around you while you move through the park’s arch-filled scenes. Even if you don’t go deep into astronomy, that idea is powerful. It changes how you shoot. Instead of grabbing one image, you start thinking in sequences: set up, wait, reframe, and see how constellations shift behind the rock.
The tour structure also sets you up to learn while you’re doing. As you reach each viewing moment, the guide can point out constellations and give context, then help you translate that into a photo you can actually take. This is where a guided night tour beats a solo attempt. In daylight, you can wander and figure things out. At night, you often can’t. Someone else’s brain doing the planning saves you a lot of frustration.
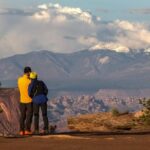
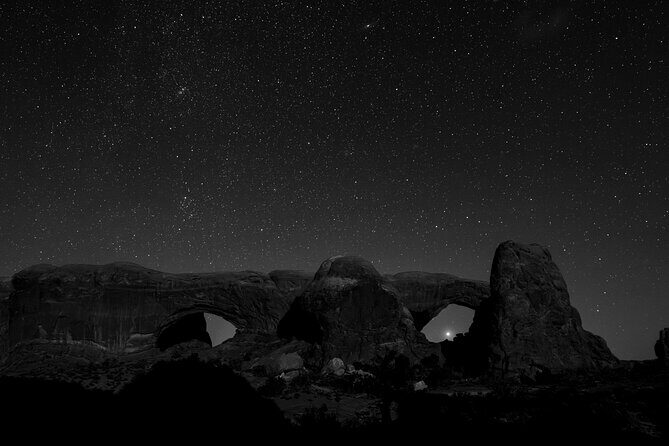
Cold air, no crowds, and the feeling of owning the sky
One theme that keeps coming up is the comfort and calm of doing this at night. Cooler evening temperatures make it easier to stay outside while you wait for the sky to align with your shot. And “no crowds” isn’t just a nice-to-have. It changes the whole experience.
When there’s less foot traffic, your eyes adapt better. Star viewing improves when there’s less stray light bouncing off people, phones, and moving flashlights. A small group also helps keep the area from feeling chaotic. You can focus on the sky and the arches together, instead of constantly stepping around other tour groups.
Other sunset and stargazing tours we've reviewed in Moab


Guide impact: why the right person matters for night photography
The guides are part of the magic here. Two names came up in feedback: Sam and Brandon. Both are described as supportive, with strong command of stars, the arches, and the nuts-and-bolts of getting photos.
Here’s what that means for you: night sky photography isn’t just equipment. It’s timing, settings, and knowing how to troubleshoot. Guides who can spot what’s going wrong—focus issues, phone brightness problems, shaky framing, or missing the right moment—help you move from frustration to results quickly.
If you bring a phone, you’ll still get the learning curve. Brandon was specifically praised for showing how to maximize phone photos. That kind of guidance is gold if you’re worried you’ll freeze the moment and end up with blurry dots instead of a Milky Way you can actually recognize.
Price and value: is $175 per person fair?
At $175 per person for roughly 2 hours, this tour sits in the “worth it if you care about results” category. Night sky experiences can be expensive, but the value here comes from a few concrete things:
- Small group size (max 6), which makes instruction more personal.
- Provided gear (including headlamps and tripods), which reduces what you have to buy or bring.
- Actual coaching for phones and cameras, so you’re not paying only for someone to point at constellations.
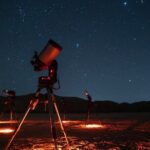
Could it feel pricey? Yes. One review flagged the feeling that it was overpriced and mentioned an expectation of a telescope. That’s a fair caution. If you’re buying this hoping for a huge telescope experience, you might feel disappointed because the emphasis is on photography with the gear you’re given and the settings you’re coached on.
But if your goal is Milky Way photos and better star knowledge without doing trial-and-error all night, $175 starts to look reasonable. You’re effectively paying for the guide’s ability to translate the sky into something you can capture.
Who this tour is best for (and who should reconsider)
This tour fits best if you want a guided night photography plan and you’re okay with a short hike. It’s especially good for:
- First-time night photographers who need a real walkthrough
- Phone shooters who want Milky Way results without specialized gear
- Families who want a fun learning outing that doesn’t require advanced camera skills
- People who hate crowds and want quieter Arches moments
You might reconsider if:
- You want a classic daytime walk with lots of time to explore trails on your own.
- You expect a telescope or a viewing-only astronomy setup.
- You’re not comfortable with nighttime conditions, including potentially challenging dark roads right before you arrive.
Practical tips so you get the best photos
The tour gives you equipment, but your preparation still matters. Since this is an evening stargazing hike, dress like you’ll be outside a while. You’ll likely be standing still during setup and while the sky shifts behind the arches.
Bring charged batteries (phones and cameras). In cold air, batteries drain faster. If you wear glasses, consider how you’ll handle them while using a headlamp. Small comfort issues can ruin your patience when you’re trying to align shots.
Also, be ready to follow the guide’s instructions quickly. Night photography rewards doing things in the right order: stabilize first, frame second, then fine-tune. The guides are there to help you get that flow.
If you’re traveling as a group of friends, it helps to be on the same page: pick who is shooting what, and avoid having everyone wander off while you’re trying to catch the same sky moments.
Should you book this Arches astro-photo hike?
I’d book it if you want a high-success, guided way to see Arches after dark and come away with photos you can be proud of. The combination of small group size, provided night gear, and coaching for phones and cameras is what makes this stand out. People repeatedly highlight Milky Way results and the guide’s patience, including help for kids and beginners.
I would hesitate only if you’re expecting a telescope-focused astronomy show or you’re uncomfortable with night driving and nighttime walking. If that’s you, this may not match your vibe.
For the right traveler, this is a great value way to experience Arches in its most dramatic lighting: rock frames on one side, moving stars on the other.
FAQ
How long is the Astro-Photo, Hiking and Stargazing Tour in Arches National Park?
The tour lasts about 2 hours.
Where does the tour meet and where does it end?
The meeting point is the Windows Section Parking Lot in Utah. The tour ends back at the same meeting point.
Is park admission included?
The tour information indicates admission ticket is free.
What equipment do you get for photographing the stars?
The tour provides equipment for the photo experience, including items such as headlamps and tripods, and guides help with phone and camera settings.
Do you need a specific camera to participate?
No. The tour is described as helpful for both phone and camera settings, so you can participate with a phone.
What happens if the weather is bad?
This experience requires good weather. If it’s canceled due to poor weather, you’ll be offered a different date or a full refund.